
How to choose quality hardwood floors for your Bay Area home
TL;DR:
- Choosing the right hardwood floors involves assessing household needs, climate considerations, and style preferences to ensure long-term satisfaction. Proper material selection, acclimation, and subfloor preparation are crucial to avoid costly mistakes and ensure durability. Focus on lifestyle fit, sustainability, and quality to select a floor that will serve your home for decades in the Bay Area.
Standing in a showroom surrounded by dozens of wood samples, finishes, and price tags is enough to make any homeowner’s head spin. The Bay Area housing market is competitive, and your flooring choice affects everything from daily comfort to long-term resale value. This guide cuts through the noise and walks you through a clear, practical selection process so you can confidently pick hardwood floors that match your lifestyle, your home’s design, and your budget without sacrificing quality or making an expensive mistake.
Table of Contents
- Assess your needs and determine your style
- Essential materials and tools for hardwood floor renovation
- Step-by-step guide to selecting the right hardwood
- Troubleshooting, common mistakes, and final checks
- The insider’s truth: What matters most when renovating with hardwood
- Ready for your upgrade? Explore Bay Area hardwood solutions
- Frequently asked questions
Key Takeaways
| Point | Details |
|---|---|
| Know your priorities | Define your household’s needs, style, and budget before starting. |
| Use the right materials | The right tools and properly acclimated wood are essential for success. |
| Follow a clear process | Selecting by species, grade, and finish helps avoid expensive mistakes. |
| Avoid common pitfalls | Site preparation and final checks save money and stress later. |
| Leverage Bay Area expertise | Local professionals can help you balance quality, cost, and design. |
Assess your needs and determine your style
Before you look at a single plank, you need to understand what you’re actually asking your floors to handle. A household with two dogs, three kids, and weekly dinner parties needs something completely different from a quiet home office setup. Getting this right from the start saves you money and frustration later.
Start by honestly mapping out your household traffic. Here’s what to think through:
- Foot traffic level: High-traffic areas like kitchens, entryways, and hallways need harder species with durable finishes.
- Pets and children: Claws and dropped toys will show on softer woods. Look for species with a high Janka hardness rating.
- Renovation budget: Your total spend should cover not just materials but installation, prep work, and a 10% overage buffer.
- Design palette: Your floors should complement your cabinetry and wall colors. If you’re unsure, explore tips on coordinating floors with cabinets before making a final call.
- Resale goals: Bay Area buyers pay a premium for real hardwood. Engineered wood also holds up well but solid hardwood often commands higher resale interest.
The Bay Area adds a layer of complexity that homeowners elsewhere don’t face. Microclimates vary dramatically from neighborhood to neighborhood. Durable, adaptable flooring is a real need here, not just a marketing phrase, because humidity swings between coastal fog and dry inland heat can stress improperly chosen wood. Sustainability also matters here more than in most markets. Local buyers increasingly ask about responsible sourcing and certifications like FSC (Forest Stewardship Council).
Pro Tip: Bring a photo of your kitchen cabinets and a paint chip from your main living space to the showroom. It takes five minutes and eliminates weeks of second-guessing once you start choosing hardwood floors in earnest.
Understanding the best wood species for your specific conditions is a shortcut that experienced renovators use every time. Species selection alone can narrow your choices from fifty options down to five.
Essential materials and tools for hardwood floor renovation
With your needs and style preferences clarified, you’ll want to understand exactly what materials and tools will ensure a smooth renovation. Whether you’re hiring a contractor or taking on a DIY install, knowing what’s required helps you ask the right questions and avoid getting oversold.
The three main plank types:
- Solid hardwood: One piece of wood from top to bottom, typically 3/4 inch thick. Excellent for above-grade installations in stable humidity environments. Can be sanded and refinished multiple times over decades.
- Engineered hardwood: A real wood veneer over layered plywood. Handles humidity fluctuation better than solid wood and works on concrete subfloors. Ideal for many Bay Area homes with variable conditions.
- Prefinished hardwood: Either solid or engineered, but factory-finished before delivery. Faster installation, consistent finish quality, and no curing odors. Slightly harder to repair if damaged.
Proper preparation and material choice are what separate a floor that lasts 50 years from one that buckles or gaps within three. This isn’t an area to cut corners.
| Material type | Best subfloor | Humidity tolerance | Refinishable | Relative cost |
|---|---|---|---|---|
| Solid hardwood | Wood only | Low to moderate | Yes (many times) | Higher |
| Engineered hardwood | Wood or concrete | Moderate to high | Yes (1-3 times) | Mid-range |
| Prefinished solid | Wood only | Low to moderate | Yes | Mid to higher |
| Prefinished engineered | Wood or concrete | Moderate to high | Limited | Mid-range |
Essential tools for installation:
- Moisture meter: Non-negotiable. Measures both the subfloor and your wood planks to prevent future warping.
- Spacers: Maintain the expansion gap around the room perimeter.
- Flooring nailer or stapler: For nail-down installations.
- Miter saw and table saw: For precise cuts around doorways and edges.
- Tapping block and pull bar: Protect plank edges during assembly.
- Chalk line and square: Keep rows straight across large rooms.
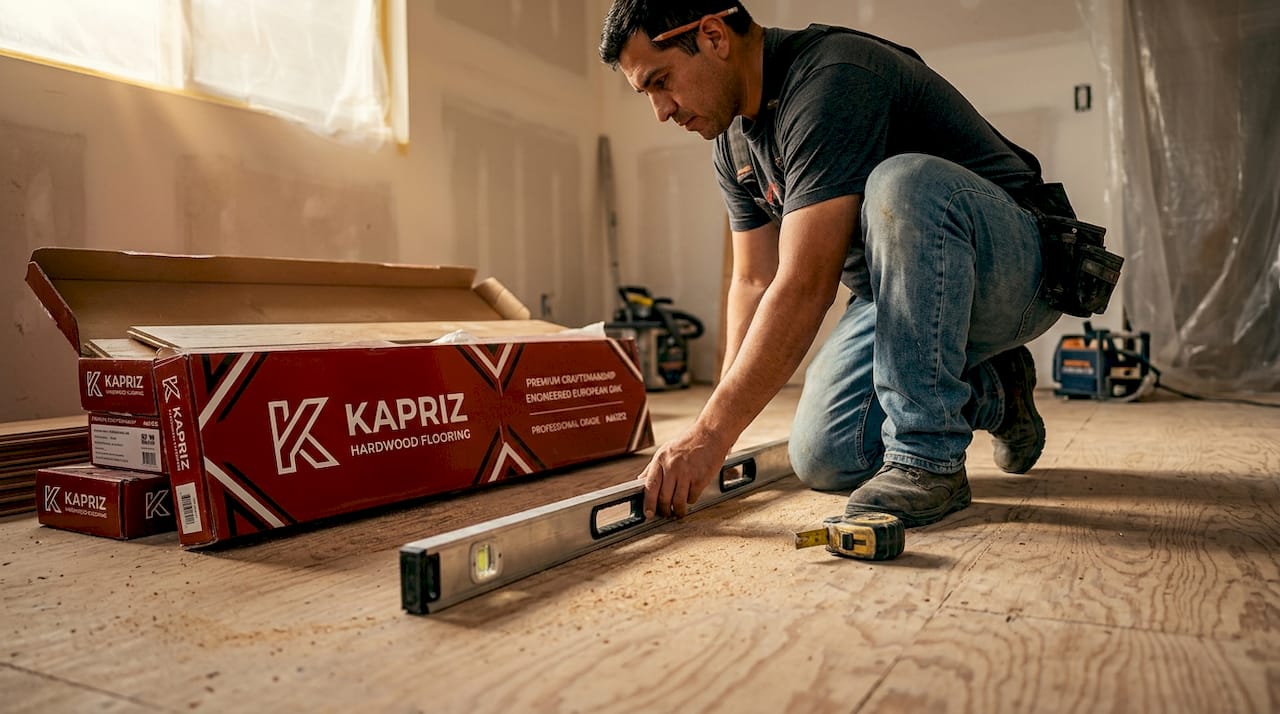
Pro Tip: Always acclimate your hardwood inside your home for at least 72 hours before installation. Stack the boxes in the room where they’ll be installed and let the wood adjust to your home’s actual temperature and humidity. Skipping this step is one of the most common reasons floors buckle. The full list of installation preparation steps is worth reviewing before your first delivery arrives.
Your contractor should also check the subfloor for flatness (within 3/16 inch over 10 feet) and nail pops before any durability concerns even come into play.
Step-by-step guide to selecting the right hardwood
Once you’ve gathered all the right materials, these are the key steps to make a sound, style-forward decision. Follow this sequence and you’ll avoid the “I wish I’d known that” regret that shows up in renovation forums constantly.
- Choose your species. Start with hardness. Oak sits around 1290 on the Janka scale and is the most popular choice in the Bay Area for good reason. It takes stain well, comes in wide and narrow planks, and holds up to busy households. Maple runs harder at 1450 and works beautifully in contemporary kitchens. Walnut is softer at 1010 but brings a rich, dark elegance that photographs beautifully for listings. Your wood species guide breaks this down by room and lifestyle.
- Select your grade. Grade refers to the character of the wood, not the quality. Clear grade shows minimal knots and grain variation. Select grade has some character marks. Common grades embrace more knots, color variation, and natural features. Higher grades cost more but look more uniform. Lower grades cost less and can look beautifully rustic. Species, grain, finish, and grade together determine the final look of your floor more than any single factor.
- Pick your finish. Oil-based polyurethane is durable and amber-toned. Water-based polyurethane dries clear and fast. Hard-wax oil gives a matte, natural feel but needs more maintenance. UV-cured finishes on prefinished boards are extremely hard. Each finish changes how the wood looks under your home’s lighting.
- Decide on color and stain. Natural is always in style, but staining can help you coordinate with existing trim or cabinetry. Test stain samples directly on your species because the same stain looks completely different on oak versus maple.
- Choose plank width. Narrow planks (2.25 to 3 inches) suit traditional and Craftsman homes. Wide planks (5 inches and up) look stunning in open-concept spaces and make smaller rooms feel larger.
| Species | Janka hardness | Common cost per sq ft | Best for |
|---|---|---|---|
| Red oak | 1290 | $3 to $7 | High-traffic areas, traditional homes |
| White oak | 1360 | $4 to $8 | Modern, Scandi, and transitional styles |
| Maple | 1450 | $4 to $8 | Contemporary kitchens and gyms |
| Walnut | 1010 | $6 to $12 | Luxury spaces, low-traffic rooms |
| Hickory | 1820 | $4 to $9 | Heavy-use homes, rustic aesthetics |
“The grade you choose should match your lifestyle, not just your taste. A family with young children often finds that a lower, character grade actually hides scratches and dents better than a pristine clear-grade floor ever could.” — Flooring renovation insight, Kapriz Hardwood Floors
If sustainability matters to you, eco-friendly flooring certified by FSC or Rainforest Alliance is widely available and increasingly sought after by Bay Area buyers. Choosing responsibly sourced wood adds value at resale and aligns with how many communities here prioritize environmental responsibility.
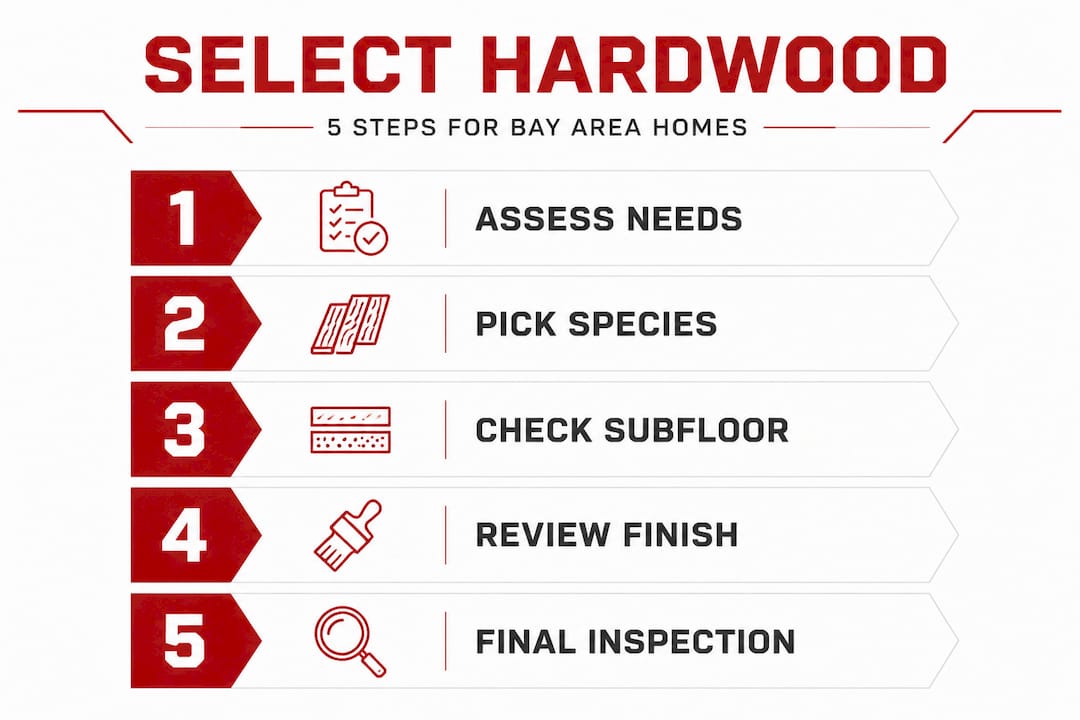
Troubleshooting, common mistakes, and final checks
With your hardwood selected, avoid these last-minute pitfalls before installation begins. Even experienced renovators make these errors, and catching them now costs nothing. Fixing them after installation costs a lot.
Most common mistakes homeowners make:
- Skipping acclimation: Moving wood directly from a truck into installation is the single biggest cause of post-install gaps and buckling.
- Ignoring subfloor moisture: High moisture in a concrete subfloor will destroy engineered wood from below, even if the wood itself is perfectly acclimated.
- Choosing the wrong grade for the lifestyle: A glossy, clear-grade floor in a home with pets will show every scratch within weeks.
- Underordering material: Always order at least 10% extra to account for cuts, waste, and future repairs.
- Poor lighting during sample selection: Viewing samples only under showroom lighting and then being surprised by how they look under your home’s natural and artificial light is extremely common.
Proper site prep and grade selection prevent costly issues that show up months after installation, not immediately. This is why rushing the selection phase is never worth it.
Studies across flooring contractors consistently show that a large share of hardwood floor repairs within the first two years trace back to improper subfloor preparation and skipped acclimation, not product defects. The wood is rarely the problem. The process usually is.
“Always view your final sample in the actual room where it will be installed, at different times of day. A floor that looks warm and honey-toned in a showroom can read completely orange under your kitchen’s recessed lighting.”
Before you approve any installation, check these boxes. First, confirm the subfloor moisture reading is within the wood manufacturer’s acceptable range. Second, verify your planks have been acclimating in the home for the recommended time period. Third, look at your sample in morning light, afternoon light, and under your actual light fixtures. Fourth, review cost-effective upgrades to make sure you haven’t overlooked an option that fits better. Fifth, ask your installer about finish warranty coverage and what voids it.
If you’re weighing hardwood against alternatives, sustainable options like bamboo and reclaimed wood are worth understanding before you finalize your decision.
The insider’s truth: What matters most when renovating with hardwood
Here’s what nobody tells you in the glossy product catalogs: most homeowner regret after a hardwood renovation isn’t about the wood. It’s about the mismatch between expectations and reality. Someone falls in love with a light natural white oak floor on Pinterest, installs it, and then watches it show every speck of dirt in their real home with three kids and a muddy dog.
The renovation industry tends to focus on product specs and installation technique. Those matter. But the conversation that actually protects a homeowner’s long-term satisfaction is the honest one about lifestyle fit. We’ve seen it happen too many times. A gorgeous floor, perfectly installed, becomes a source of daily frustration because nobody asked the right questions before the first nail went in.
What top Bay Area renovation professionals actually look for isn’t just hardness ratings and finish quality. They look at the room’s microclimate. North-facing rooms in foggy neighborhoods behave differently than south-facing rooms in warm inland suburbs. They ask about maintenance willingness. A hard-wax oil finish looks incredible but needs more attention than a polyurethane. They check on finish warranties and what specific conditions void them.
Most DIYers and even some contractors overlook responsible sourcing entirely. In the Bay Area, this is a missed opportunity. Eco-friendly elegance is becoming a legitimate selling point in local real estate. FSC-certified wood can be a real differentiator when it’s time to list.
The floor you choose today will be in your home for potentially 30 to 50 years if chosen and maintained well. That makes it one of the most consequential decisions in any renovation. Give it the full attention it deserves.
Ready for your upgrade? Explore Bay Area hardwood solutions
You’ve done the homework. You understand your lifestyle, your subfloor conditions, your species options, and the common mistakes to avoid. Now the next step is finding the right products without having to piece together the research yourself.
At Kapriz Hardwood Floors, we’ve built our entire selection around one principle: every homeowner deserves a beautiful, durable floor at a price that makes sense. Whether you’re drawn to budget-friendly options or luxury wide-plank walnut, our inventory covers it all and none of it is filler. Browse our affordable Bay Area hardwood options to see what’s available right now, or explore hardwood floors across our full catalog. If you want help matching a product to your specific home and renovation goals, our team is ready for a real conversation. See how our upgrading for value guide can help you get the most from your renovation budget.
Frequently asked questions
What hardwood species are most popular for Bay Area renovations?
Oak, maple, and walnut are the top choices because they offer a wide range of colors, strong durability, and proven resale appeal. Species, grain, finish, and grade all play a role in how each one performs and looks in your specific home.
How do I know if I need solid or engineered hardwood?
Choose solid hardwood for wood subfloors in homes with stable indoor humidity, and engineered hardwood if you have a concrete subfloor or live where humidity varies seasonally. Proper preparation and material choice make the difference between a floor that lasts decades and one that needs early repair.
Does acclimating hardwood really matter?
Yes, absolutely. Skipping acclimation is one of the leading causes of warping, gapping, and buckling in otherwise high-quality floors. Give your planks at least 72 hours inside your home, following the job preparation guidelines your product specifies.
Are there sustainable hardwood options for renovations?
Many Bay Area suppliers carry FSC-certified and responsibly sourced hardwoods that meet both environmental standards and performance expectations. Explore eco-friendly hardwood flooring options that align with local buyer values and hold up beautifully for decades.


