
5 steps to prepare your Bay Area home for hardwood
TL;DR:
- Bay Area’s microclimates cause moisture fluctuations that threaten hardwood flooring longevity.
- Engineered hardwood is recommended over solid for better stability in regional humidity conditions.
- Proper preparation, including moisture testing, acclimation, and subfloor checks, ensures lasting hardwood floors.
You’ve picked out your hardwood floors, you’re excited to transform your home, and then it hits you: the Bay Area’s famously unpredictable humidity could ruin everything if you skip the prep work. From foggy coastal neighborhoods to warm inland valleys, the region’s microclimates create moisture swings that catch homeowners off guard. Solid hardwood that looks perfect in the showroom can buckle, gap, or cup within months if your home isn’t properly prepared. This guide walks you through every critical step, from assessing your environment to final installation checks, so your new floors last for decades.
Table of Contents
- Assess your home’s environment and choose the right hardwood
- Prep your space: Tools, materials, and clearing the floor
- Verify and prepare your subfloor for installation
- Acclimate hardwood flooring and final installation checks
- Why proper prep makes hardwood last in the Bay Area
- Get expert help for flawless hardwood installation
- Frequently asked questions
Key Takeaways
| Point | Details |
|---|---|
| Engineered hardwood preferred | Choose engineered hardwood for best results in the Bay Area’s variable humidity. |
| Moisture testing protects floors | Subfloor moisture tests using RH probes or calcium chloride are essential for preventing installation issues. |
| Space prep streamlines install | Clearing your rooms and assembling the right tools makes hardwood installation faster and safer. |
| Acclimation prevents surprises | Acclimate hardwood flooring to your home’s conditions to avoid expansion or contraction problems. |
Assess your home’s environment and choose the right hardwood
The Bay Area isn’t one climate. It’s dozens. A home in the Sunset District in San Francisco sits in near-constant fog, while a house in Walnut Creek bakes in dry summer heat. Relative humidity (RH) across the region swings between 50% and 85% depending on your zip code and the season. That range matters enormously for hardwood flooring because wood expands and contracts with moisture changes.
Solid hardwood is beautiful, but it’s highly sensitive to those swings. Engineered hardwood for Bay Area homes is a smarter choice because its cross-layered construction resists movement caused by humidity fluctuations. The Bay Area prep steps guide confirms: for Bay Area homes, prioritize engineered hardwood over solid due to microclimates and humidity variations of 50 to 85% RH, and always use moisture barriers on concrete slabs.
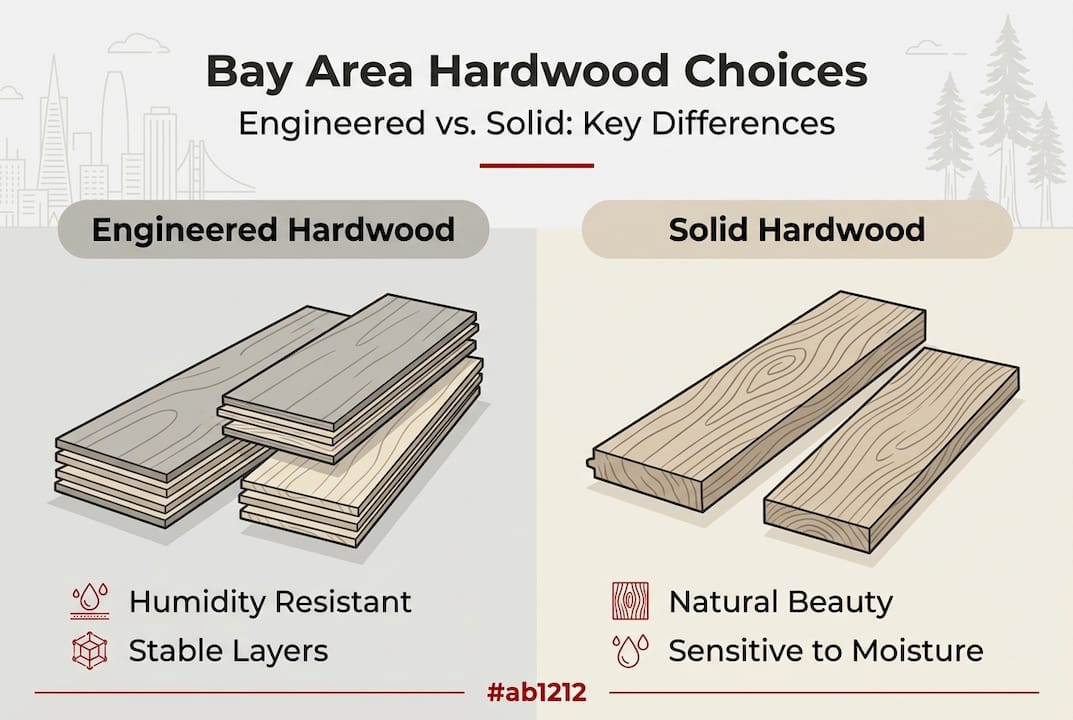
Engineered vs. solid hardwood: a quick comparison
| Feature | Engineered hardwood | Solid hardwood |
|---|---|---|
| Humidity resistance | High | Low to moderate |
| Best for Bay Area | Yes | Limited use |
| Works over concrete | Yes (with barrier) | Not recommended |
| Refinishing potential | Moderate | High |
| Cost range | Affordable to luxury | Mid to high |
When choosing hardwood floors for your Bay Area home, also consider your subfloor type. Concrete slabs are common in newer construction and require a moisture barrier before any hardwood goes down. Older homes with plank subfloors often need a plywood overlay to create a stable, flat surface.
Here’s what to check before you buy a single plank:
- Measure your home’s RH using a digital hygrometer for at least 48 hours
- Identify your subfloor type (concrete slab, plywood, or plank)
- Check for visible moisture damage like staining, soft spots, or mold
- Note your microclimate by researching average humidity for your specific city or neighborhood
Pro Tip: Don’t rely on a single humidity reading. Take measurements in the morning and evening for two days straight. Bay Area fog can spike indoor RH overnight, and that average matters more than any single snapshot.
Prep your space: Tools, materials, and clearing the floor
With your hardwood chosen, next up is prepping the space itself. This stage is where most homeowners rush, and rushing here causes problems that show up months later.
Start by gathering everything you need before the flooring arrives. Having the right tools on hand prevents delays and keeps the project moving safely.
Essential tools and materials checklist:
- Moisture meter (pin-type or pinless)
- Calcium chloride test kits or RH probes for concrete
- Pry bar and pull bar for baseboards
- Circular saw or miter saw
- Tapping block and rubber mallet
- Underlayment or moisture barrier rolls
- Flooring adhesive (if gluing over concrete)
- Spacers for expansion gaps
- Safety glasses and knee pads
Clearing the room is more involved than just moving furniture. Appliances with water lines, like refrigerators and dishwashers, need to be disconnected and moved out. Baseboards should come off carefully so they can be reinstalled later. Door frames often need to be undercut so the new flooring slides underneath cleanly.
Steps to clear and prep your floor space:
- Remove all furniture and appliances from the room
- Pull off baseboards carefully using a pry bar
- Undercut door frames with a jamb saw or handsaw
- Remove old flooring down to the subfloor
- Sweep, vacuum, and clean the subfloor thoroughly
- Test concrete subfloors using calcium chloride or RH probes
For older Bay Area homes with original plank subfloors, the subflooring materials guide explains when a plywood overlay is necessary. Plank subfloors have gaps and movement that can telegraph through your new hardwood over time.
Once the space is clear, bring your hardwood boxes into the room and let them sit. This is called acclimation, and it’s one of the most skipped steps in the entire process. Acclimating hardwood flooring before installation allows the planks to reach equilibrium with your home’s specific temperature and humidity.
Pro Tip: Stack your hardwood boxes with small wooden spacers (called stickers) between each layer. This lets air circulate around every board, speeding up acclimation and ensuring even moisture adjustment throughout the entire batch.
Verify and prepare your subfloor for installation
Once your space is clear, verifying and preparing your subfloor is critical. A beautiful floor installed over a bad subfloor is a floor that will fail. This step separates homeowners who get decades of performance from those who face expensive repairs within a year.
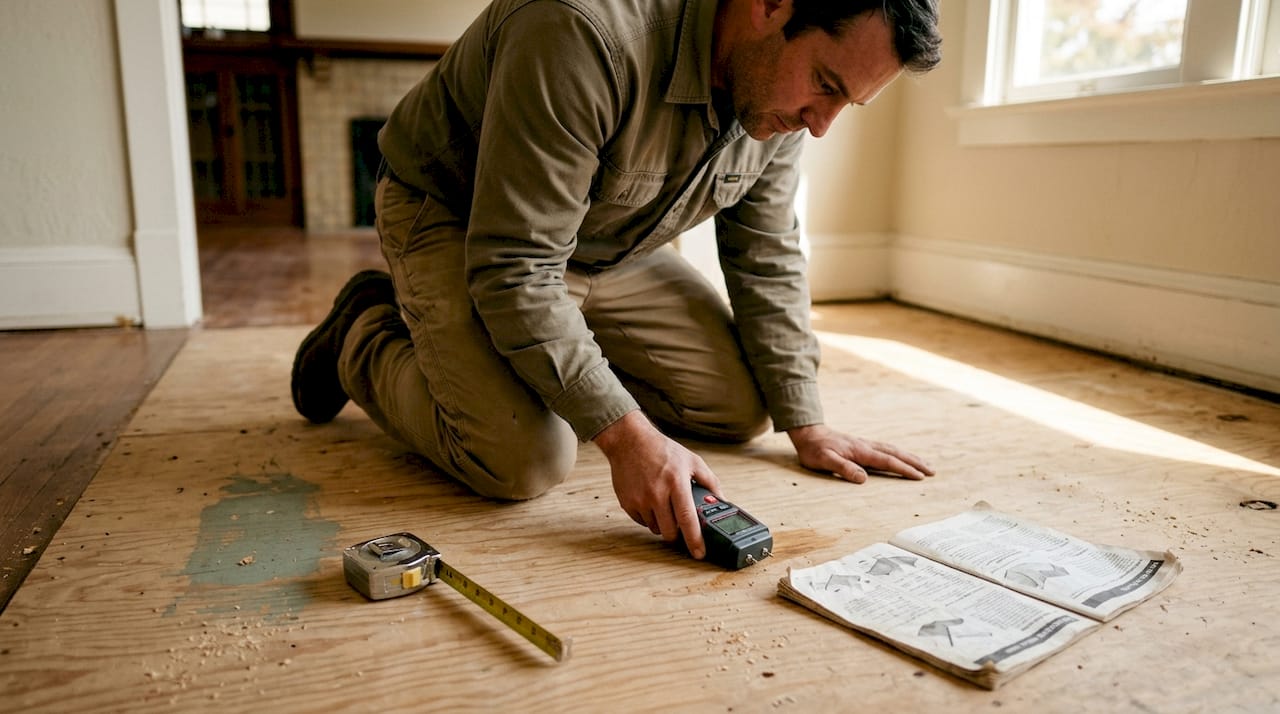
Moisture testing is non-negotiable. For concrete slabs, use either a calcium chloride test (which measures moisture vapor emission) or an in-situ RH probe test (which measures moisture inside the concrete). The subfloor tips resource confirms: for Bay Area homes, test concrete with RH probes or calcium chloride before any installation begins.
For wood subfloors, a pin-type moisture meter works well. Most hardwood manufacturers require the subfloor to read below 12% moisture content, and the difference between the subfloor and the hardwood planks should be no more than 4%.
Subfloor preparation checklist:
- Test moisture levels and record results
- Sand down high spots (anything over 3/16 inch in a 10-foot span is too much)
- Fill low spots and cracks with floor-leveling compound
- Secure any squeaky or loose boards with screws
- Install a moisture barrier if required by your hardwood manufacturer
- Confirm the subfloor is clean, dry, and structurally sound
A subfloor that is flat, dry, and solid is the single most important factor in how your hardwood floor performs over time. Don’t rush this step.
For durable flooring options in the Bay Area, the subfloor condition directly affects how long your investment lasts. Plywood overlays over old plank subfloors are a smart upgrade that adds rigidity and a consistent nailing surface.
Pro Tip: After laying your moisture barrier, tape every seam with manufacturer-approved tape. An untaped seam is a gap where moisture vapor can still sneak through, especially in Bay Area homes near the coast.
Acclimate hardwood flooring and final installation checks
When your subfloor is ready, the last steps before installation begin. Acclimation is not optional in the Bay Area. It is the difference between a floor that performs beautifully and one that gaps in summer and buckles in winter.
Acclimating tips confirm that acclimation reduces expansion and contraction after installation by allowing planks to reach the moisture content of your living space before they’re locked in place. Most manufacturers recommend 3 to 7 days minimum, but Bay Area homes with higher humidity may need up to 10 days.
While storing flooring for acclimation, keep the room at normal living conditions. Run your HVAC system as you normally would. Don’t open all the windows to speed things up. The goal is to mimic exactly how the room will feel after you move back in.
Final pre-installation checklist:
- Confirm hardwood moisture content is within 2 to 4% of subfloor reading
- Verify subfloor flatness one more time with a long straightedge
- Check that all moisture barriers are fully taped and intact
- Confirm room temperature is between 60°F and 80°F
- Verify expansion gaps are planned at all walls and fixed objects
- Review manufacturer’s installation instructions one final time
Common mistakes at this stage include pulling planks from only one or two boxes (which creates visible color banding) and skipping the final moisture check after a rainy week. Bay Area weather is unpredictable, and a storm the night before installation can change your subfloor readings.
Pro Tip: Pull planks from at least three open boxes at a time during installation. This blends color and grain variation naturally across the floor, giving you a result that looks intentional and professional rather than patchy.
Why proper prep makes hardwood last in the Bay Area
Here’s a perspective that most installation guides won’t tell you: the Bay Area’s reputation for mild weather actually works against homeowners. People assume mild means stable, but mild and stable are not the same thing. The fog, the marine layer, the valley heat, these factors create constant low-level moisture movement that adds up over years.
We’ve seen high-end floors fail not because the product was bad, but because the prep was skipped. A customer once installed premium solid hardwood in a Berkeley home without testing the subfloor. Within eight months, the boards had cupped along every row near the exterior walls. The Bay Area prep steps confirm: engineered preferred for stability in humid Bay Area conditions, with concrete testing as a baseline requirement.
The uncomfortable truth is that prep costs time and a little money upfront, but skipping it costs far more later. For anyone investing in luxury flooring trends or premium hardwood, the prep is where you protect that investment. The floor itself is only as good as the foundation beneath it and the process that got it there.
Get expert help for flawless hardwood installation
Preparing your Bay Area home for hardwood installation takes real attention to detail, but you don’t have to figure it all out alone.
At Kapriz Hardwood Floors, we carry a wide range of quality hardwood options designed to perform in Bay Area climates, from affordable engineered planks to premium luxury brands. You can view hardwood options to find the right fit for your home and budget. We also offer guidance on subfloor services to make sure your base is installation-ready. And if you want a full roadmap before you start, our durable flooring guide covers everything from product selection to long-term care. Everyone deserves a beautiful, lasting floor, and we’re here to help you get it right the first time.
Frequently asked questions
Do I need to test my home’s subfloor for moisture in the Bay Area?
Yes, moisture testing is critical in the Bay Area due to regional humidity. Use calcium chloride or RH probes on concrete slabs to confirm safe moisture levels before installation.
Is engineered hardwood really better for Bay Area homes?
Engineered hardwood is specifically recommended for Bay Area climates because its layered construction resists the humidity and microclimate fluctuations that cause solid hardwood to move and fail.
Why do I need to acclimate hardwood flooring before installation?
Acclimation reduces expansion and contraction after installation by letting planks adjust to your home’s specific humidity before they’re locked in place.
Can I install hardwood floors myself, or should I hire a pro?
Homeowners can install hardwood, but in the Bay Area, professional-grade moisture testing and proper acclimation protocols are strongly advised to avoid costly post-installation problems.


