
Bay Area hardwood DIY guide: 5 steps to success
TL;DR:
- Bay Area’s microclimates require engineered hardwood with proper acclimation and moisture barriers.
- Correct installation, patience, and understanding local conditions lead to durable, lasting floors.
- Skipping moisture testing and acclimation causes most DIY hardwood flooring issues in the region.
Bay Area homeowners are some of the most enthusiastic DIYers in the country, but hardwood flooring installation here comes with a twist most tutorials skip entirely. The region’s famous microclimates, coastal fog, and swinging humidity levels create conditions that can destroy a beautiful new floor within months if you install it wrong. Engineered hardwood has become the go-to choice for good reason, and this guide walks you through every stage: what to buy, how to prep your space, how to install correctly, and what to do when things go sideways. Get this right, and you’ll have floors that last decades.
Table of Contents
- Understanding Bay Area flooring challenges
- Gathering the right tools and materials
- Preparing your space for installation
- Step-by-step installation methods
- Troubleshooting and avoiding common mistakes
- Our take: Bay Area hardwood DIY, done right
- Ready for your new hardwood floors?
- Frequently asked questions
Key Takeaways
| Point | Details |
|---|---|
| Moisture matters | Bay Area humidity demands engineered flooring, moisture barriers, and acclimation for success. |
| Preparation pays off | Testing and prepping your subfloor prevents squeaks, warping, and future repairs. |
| Choose installation wisely | Select nail-down, glue-down, or floating methods based on your floor structure and skills. |
| Avoid common DIY errors | Never skip moisture tests, acclimation, or expansion gaps to ensure lasting hardwood floors. |
Understanding Bay Area flooring challenges
The Bay Area is not a single climate. San Francisco’s Sunset District sits in near-constant fog, while Walnut Creek bakes in dry summer heat. Fremont and San Jose fall somewhere in between. This patchwork of microclimates is exactly why flooring choices that work in Phoenix or Denver can fail spectacularly here.
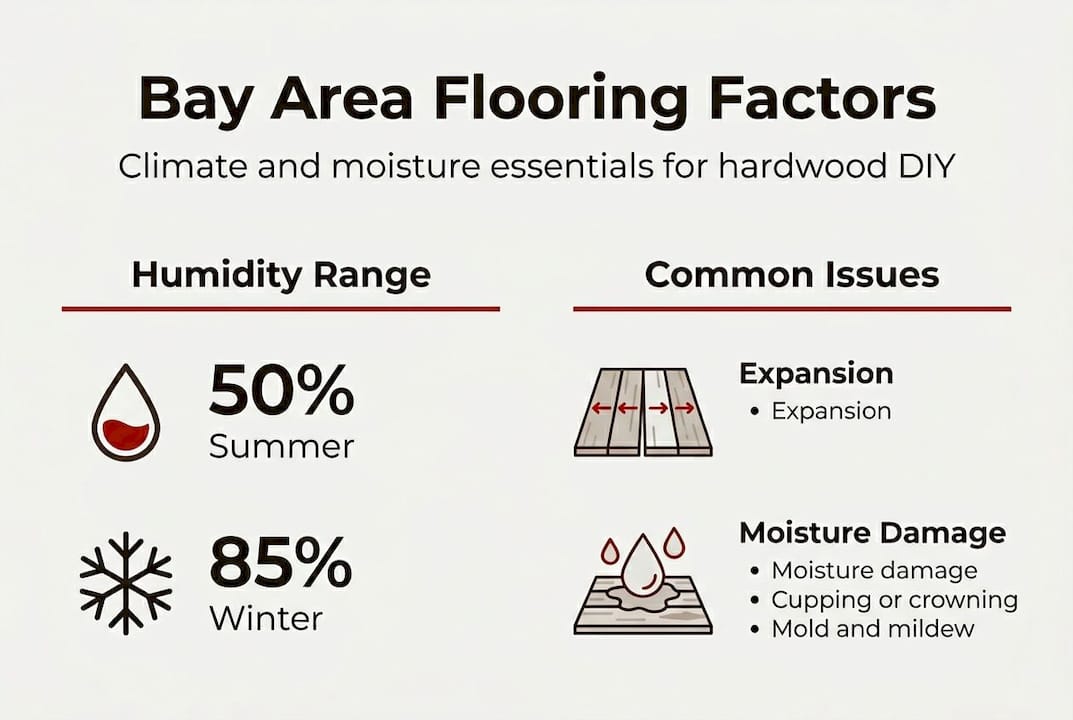
Bay Area humidity ranges from 50% in dry months to 85% in winter and foggy seasons, which directly changes the moisture content inside wood floors. Wood expands when it absorbs moisture and contracts when it dries out. Repeat that cycle enough times without the right flooring type or installation method, and you get buckling, cupping, and squeaks.
This is why engineered hardwood is the smart call for most Bay Area homes. Unlike solid hardwood, engineered planks are built from multiple layers of wood pressed in alternating directions. That cross-ply construction resists the swelling and shrinking that humidity swings cause. For species selection, white oak outperforms red oak in humid conditions because its tighter grain structure limits moisture absorption. These durable hardwood flooring tips can save you from expensive repairs down the road.
Here’s what you need to account for before buying a single plank:
- Moisture barrier: Use 6-mil polyethylene sheeting over concrete slabs, or a two-part epoxy moisture barrier in high-humidity zones like basements or ground-floor rooms near the coast.
- Acclimation period: Let your flooring sit in the installation room for at least 7 days before you touch it. This allows the planks to adjust to the room’s actual humidity level.
- Species choice: White oak, hickory, and hard maple handle moisture better than softer or more porous species.
- Subfloor type: Concrete slabs are common in Bay Area homes and require glue-down or floating methods, not nail-down.
Understanding the hardwood installation methods available to you is the first step toward matching your approach to your specific subfloor and climate zone.
Gathering the right tools and materials
Once you understand the local climate’s influence, assembling the right supplies is your next step. Walking into a hardware store without a list is how Bay Area DIYers end up with the wrong nailer, the wrong adhesive, or planks that don’t suit their subfloor.

Engineered vs. solid hardwood: a quick comparison
| Feature | Engineered hardwood | Solid hardwood |
|---|---|---|
| Moisture resistance | High | Low to moderate |
| Subfloor compatibility | Concrete, plywood | Plywood only |
| Installation methods | Nail, glue, float | Nail or staple |
| Refinishing potential | 1 to 3 times | 4 to 7 times |
| Best for Bay Area | Yes | Limited use |
As noted by flooring experts, engineered hardwood is prioritized for the Bay Area due to greater moisture stability. That’s not a preference. In many Bay Area homes, it’s a necessity.
Before you start, check the floor prep checklist and review flooring grades to make sure you’re buying the right product for your project.
Essential tools:
- Moisture meter (digital, for both wood and concrete)
- Miter saw and table saw or circular saw
- Pneumatic flooring nailer or stapler (for nail-down)
- Tapping block and pull bar (for floating/click-lock)
- Chalk line and tape measure
- Rubber mallet
- Pry bar and spacers
Safety equipment:
- N95 respirator (sawdust is a real hazard)
- Knee pads (you’ll be on the floor for hours)
- Ear protection (pneumatic nailers are loud)
- Safety glasses
Pro Tip: Rent a pneumatic flooring nailer from a local tool rental shop instead of buying one. You’ll use it for one project, and a quality rental costs a fraction of the purchase price.
Preparing your space for installation
Now that everything is ready, it’s time to take the crucial pre-installation steps that most DIYers overlook. This is where Bay Area projects succeed or fail.
Step-by-step subfloor preparation:
- Test for moisture. Use a moisture meter on wood subfloors. For concrete, run a calcium chloride test for 72 hours. Wood subfloor moisture should be below 12%, and the difference between subfloor and flooring moisture should be under 4%.
- Level the subfloor. Use a long straightedge to find high and low spots. Fill low areas with floor leveling compound. Sand or grind down high spots. Floors must be flat within 3/16 inch over 10 feet.
- Clean thoroughly. Sweep, vacuum, and scrape off any adhesive residue, paint, or debris. Even small bumps under your flooring will cause squeaks.
- Install underlayment or moisture barrier. Roll out 6-mil poly sheeting with 6-inch overlaps at seams for concrete slabs. For floating installations, use a foam or cork underlayment with a built-in vapor barrier.
- Mark your layout line. Snap a chalk line parallel to the longest wall to keep your first row straight.
- Acclimate your planks. Stack them in the room with spacers between rows for airflow, and leave them for at least 7 days.
“Skipping acclimation and moisture testing leads to floor buckling and squeaks.” This is the number one mistake we see in Bay Area DIY installs.
Learn more about acclimating hardwood flooring before you begin, and if you’re working over a slab, review the concrete prep steps specific to that subfloor type.
Pro Tip: Buy a hygrometer (a humidity meter) for around $15 and leave it in the room during acclimation. If humidity swings more than 10% during that week, extend your acclimation period.
Step-by-step installation methods
With the preparation done, you’re ready to install your hardwood floors. The method you use depends on your subfloor type and the flooring product you chose.
Method comparison at a glance:
| Method | Best subfloor | Best flooring type | Skill level |
|---|---|---|---|
| Nail-down | Plywood | Solid or engineered | Intermediate |
| Glue-down | Concrete | Engineered hardwood | Intermediate |
| Floating | Any | Click-lock engineered | Beginner |
As installation guides confirm, nail-down suits plywood, glue-down suits concrete, and floating works best for click-lock planks. Match your method to your situation, not to what’s easiest.
Nail-down method:
- Place your first row along the chalk line, groove side facing the wall, with 3/4-inch spacers at the wall.
- Face-nail the first row by hand since the nailer can’t reach the wall.
- From the second row on, use the pneumatic nailer at a 45-degree angle through the tongue of each plank.
- Stagger end joints by at least 6 inches between rows.
- Leave a 3/4-inch expansion gap at all walls.
Glue-down method:
- Spread urethane adhesive with a trowel, working in small sections (about 4 square feet at a time).
- Press planks firmly into the adhesive, using a rubber mallet to seat them.
- Wipe excess adhesive immediately with a damp cloth.
- Use painter’s tape to hold rows together while the glue sets (usually 24 hours).
Floating method:
- Lay underlayment if not pre-attached to planks.
- Click the first row together, maintaining your expansion gap.
- Use a tapping block and pull bar to lock planks without damaging edges.
- Stagger joints and keep rows tight.
Pro Tip: In Bay Area coastal zones, use a flexible urethane adhesive for glue-down installs. Rigid adhesives crack when humidity causes slight movement in the slab.
For a deeper look at each approach, the installation methods guide and choosing installation method pages cover the details. You can also follow the 2026 install guide for the most current best practices.
Troubleshooting and avoiding common mistakes
Even with the best preparation and planning, DIY projects can hit snags. Here’s how to deal with the most common ones.
The top installation errors include skipping acclimation, skipping moisture testing, leaving an uneven subfloor, missing expansion gaps, poor plank staggering, and using the wrong installation method for the subfloor. Every single one of these is preventable.
Common problems and fixes:
- Buckling or cupping: Usually caused by excess moisture. Check for plumbing leaks, add a dehumidifier, and allow the floor to dry. If severe, affected planks must be replaced.
- Squeaking: Often from planks rubbing against each other or a subfloor that wasn’t level. Inject construction adhesive into the seam from below if you have basement access.
- Gaps between planks: This happens when flooring wasn’t acclimated long enough and then dried out after install. Small gaps can be filled with color-matched wood filler. Large gaps require re-installation.
- Weak or loose seams (floating floors): Usually from missing the click-lock fully. Carefully lift the affected rows and re-click them properly.
- Crooked rows: Happens when the first row wasn’t set on a true chalk line. Prevention is the only real fix. If it’s off, pull up the first few rows and start again.
“The most expensive flooring mistake is the one you discover six months after installation.”
Know when to call a professional. If you find active moisture intrusion, significant subfloor damage, or structural issues, stop and get an expert involved. Covering a problem with new flooring makes it worse. Review common flooring failures and the top flooring mistakes to go in with your eyes open.
Our take: Bay Area hardwood DIY, done right
After seeing hundreds of Bay Area installs, the pattern is clear: the homeowners who get beautiful, lasting results are almost never the fastest ones. They’re the most patient ones.
Here’s the contrarian truth most flooring content won’t tell you: a mid-range engineered hardwood installed slowly and correctly will outlast an expensive solid hardwood floor rushed into place. The Bay Area’s microclimates don’t care how much you spent per square foot. They care about moisture content, acclimation, and expansion gaps.
The DIYers who struggle are the ones who treat flooring like furniture assembly. It’s not. It’s a construction project that interacts with your home’s humidity, your slab, and your local weather every single day. Those who test, acclimate, and adapt their approach to their specific microclimate often outperform even some professional crews who rely on generic methods.
If you’re weighing whether to go fully DIY or bring in help for part of the job, the DIY vs. pro install comparison is worth reading before you decide. There’s no shame in hiring out the subfloor prep while doing the install yourself.
Ready for your new hardwood floors?
If you’re inspired to tackle your project, reliable resources and materials can make all the difference. At Kapriz Hardwood Floors, we stock products we’d put in our own homes, from budget-friendly engineered options to high-end hardwood that will turn heads for decades.
Browse our full selection when you shop hardwood floors online, or explore wood flooring ideas to find the look that fits your home. If you’re leaning toward something more traditional, check out our solid hardwood options for rooms where conditions allow. We’re here to help you choose the right product for your Bay Area home, whether you’re going full DIY or want a little guidance along the way.
Frequently asked questions
How long should hardwood flooring acclimate before installation in the Bay Area?
Flooring should acclimate for at least 7 days in the room where it will be installed, allowing it to match the local humidity and prevent post-install buckling. In particularly foggy or coastal areas, extending to 10 days is a smart call.
What’s the best hardwood flooring type for Bay Area homes?
Engineered hardwood outperforms solid hardwood in Bay Area microclimates because its layered construction resists the expansion and contraction caused by humidity swings. White oak is a top species choice for its tight grain and moisture resistance.
How do I test my subfloor for moisture?
Use a digital moisture meter for wood subfloors and a calcium chloride test for concrete slabs. Moisture testing is critical in Bay Area installs before any flooring goes down.
What’s the most common mistake with DIY hardwood installation?
Skipping acclimation and moisture testing is the leading cause of warping, buckling, and squeaking in DIY hardwood floors, especially in humidity-prone Bay Area homes.
Recommended
- Upgrade hardwood floors cheaply in the Bay Area: 2026 guide | Kapriz Hardwood Flooring Store
- How to choose hardwood floors for your Bay Area home | Kapriz Hardwood Flooring Store
- What Are the Ideal Hardwood Flooring Solutions for Bay Area Homes? | Kapriz Hardwood Flooring Store
- Hardwood Floor Installation Methods: Choose Right | Kapriz Hardwood Flooring Store


