
Upgrade hardwood floors cheaply in the Bay Area: 2026 guide
Hardwood floors don’t have to drain your savings account. In the Bay Area, where renovation costs run high, many homeowners assume beautiful hardwood is out of reach on a modest budget. The truth is, modern engineered hardwood and smart refinishing techniques can deliver stunning results without the premium price tag. Whether you’re updating a single room or your entire home, understanding your options upfront means you can make choices that look great, hold up to Bay Area humidity, and add real value to your property.
Table of Contents
- What makes hardwood upgrades affordable?
- Choosing the best cheap hardwood option for your Bay Area home
- How to refinish hardwood floors on a budget
- Comparing upgrade methods: install new vs refinish existing
- Get expert help upgrading your hardwood floors — Bay Area specialists
- Frequently asked questions
Key Takeaways
| Point | Details |
|---|---|
| Engineered hardwood saves money | Engineered hardwood is a cost-effective, durable option ideal for Bay Area conditions. |
| Refinishing extends floor life | Refinishing adds another decade or more of use to existing hardwood for a fraction of the price. |
| Labor drives upgrade costs | In the Bay Area, labor makes up most of the cost, so choosing easy-to-install options or DIY can mean big savings. |
| Choose thick veneers | Always select engineered hardwood with a veneer over 3mm for durability and refinishing potential. |
What makes hardwood upgrades affordable?
Affordability in hardwood flooring comes down to three things: the material you choose, how it gets installed, and whether you’re replacing or refreshing. Getting clear on each one helps you avoid overspending.
Engineered hardwood is almost always less expensive than solid hardwood. Solid hardwood typically runs $8 to $15 per square foot for materials alone, while engineered options land between $3 and $9 per square foot. That gap adds up fast in a Bay Area home. You can explore the full range of quality hardwood options to see what fits your budget and style.
Labor is where Bay Area costs really climb. According to a cost breakdown for engineered hardwood, labor drives 60 to 70% of total installation costs in high-cost metro areas. That means on a $5,000 project, you could be paying $3,000 or more just for installation. Choosing a floating floor system (a click-lock engineered product that doesn’t need glue or nails) can make DIY installation realistic for handy homeowners.
Here’s a quick cost comparison to frame your planning:
| Material type | Material cost per sq ft | Typical install cost per sq ft |
|---|---|---|
| Solid hardwood | $8 to $15 | $4 to $8 |
| Engineered hardwood | $3 to $9 | $3 to $6 |
| Refinishing existing floor | N/A | $2 to $5 |
Key factors that affect your final price:
- Veneer thickness: Thicker veneers (3mm or more) cost slightly more but allow refinishing later
- Plank width: Wide planks look luxurious but expand and contract more with humidity changes
- Finish type: Pre-finished floors save on labor; site-finished floors offer more customization
- Subfloor condition: A damaged subfloor adds prep costs before any flooring goes down
If you want to see what affordable hardwood flooring looks like in practice for Bay Area homes, there are options at every price point that don’t sacrifice durability.
Choosing the best cheap hardwood option for your Bay Area home
The Bay Area’s climate is unique. Coastal fog, temperature swings between inland valleys and the coast, and older home construction all affect how hardwood performs. Choosing the wrong product means warping, gapping, or a floor that looks worn within a few years.
Engineered hardwood is the smarter pick for most Bay Area homes. It’s built with a real wood veneer bonded over layers of plywood or high-density fiberboard, which makes it far more resistant to moisture-related movement. Engineered hardwood reviews confirm that engineered is more stable in humid climates and costs less than solid wood, though it has limited refinishing potential compared to solid. For hardwood solutions for Bay Area conditions specifically, engineered is the go-to recommendation.
Here’s how the two main options stack up:
| Feature | Engineered hardwood | Solid hardwood |
|---|---|---|
| Cost | Lower | Higher |
| Humidity resistance | High | Low to moderate |
| Refinishing potential | 1 to 2 times (if veneer is 3mm+) | 5 to 7 times |
| DIY installation | Easy (floating) | Harder (nail-down) |
| Lifespan | 25 to 30 years | 50+ years with care |
When shopping for engineered hardwood for Bay Area conditions, watch for these features:
- Veneer thickness of 3mm or more: Anything thinner cannot be sanded and refinished, which limits your long-term options
- Aluminum oxide finish: This is the most durable factory finish available and resists scratches far better than standard polyurethane
- Plank width under 5 inches: Wider planks are beautiful but expand more with humidity, increasing the risk of gaps or buckling
- AC3 or AC4 wear rating: These ratings indicate commercial-grade durability, which translates to longer life in busy households
Pro Tip: Before buying, ask for the product’s moisture content rating and compare it to your home’s average indoor humidity. A mismatch here is the number one cause of premature floor failure in the Bay Area.
If you’re still weighing your choices, a guide on choosing hardwood floors for Bay Area homes can walk you through the decision in more detail.
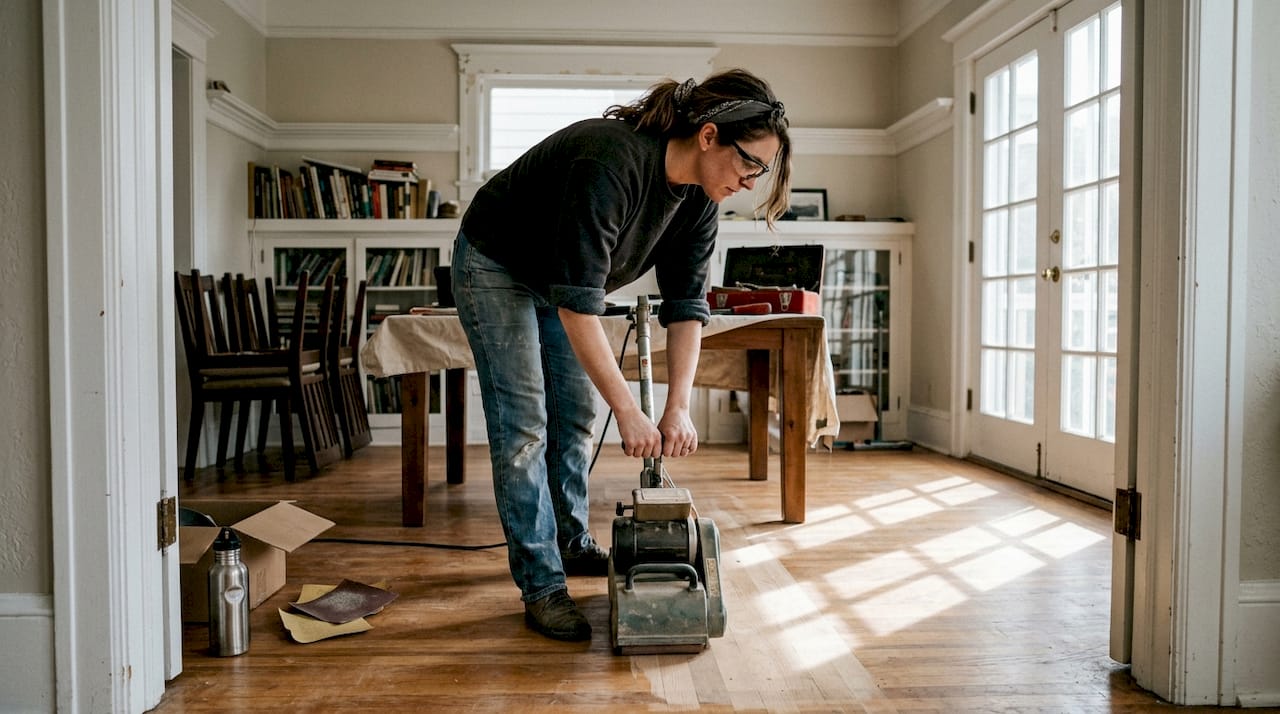
How to refinish hardwood floors on a budget
Refinishing is one of the most cost-effective moves a Bay Area homeowner can make. Instead of ripping out old floors and starting fresh, you sand down the surface, apply a new stain, and seal it with a fresh coat of finish. The result looks like a brand-new floor at a fraction of the replacement cost.
A proper refinishing methodology shows that refinishing can add up to 15 years of usable life to an existing hardwood floor. That’s a significant return on a relatively small investment. For context, professional refinishing in the Bay Area typically runs $2 to $5 per square foot, compared to $6 to $15 or more for full replacement.
Here’s how the process works, step by step:
- Inspect the floor: Check for deep gouges, loose boards, or boards thinner than 3/4 inch. Floors with structural damage need repair before sanding.
- Sand the surface: Use a drum sander for the main field and an edge sander for perimeter areas. Start with coarse grit (36 or 40) and work up to fine (80 or 100).
- Clean thoroughly: Vacuum and tack-cloth the entire surface to remove all dust before applying any finish.
- Apply stain (optional): If you want a color change, apply an oil-based or water-based stain evenly and let it dry completely.
- Apply finish coats: Two to three coats of polyurethane (water-based dries faster; oil-based is more durable) with light sanding between coats.
- Allow full cure time: Traffic can resume in 24 to 48 hours, but full hardness takes 7 to 14 days.
Dustless sanding systems are worth the extra cost if you’re hiring a pro. They capture up to 99% of dust at the source, protecting your HVAC system and making cleanup far easier.
Pro Tip: If you’re going the DIY route, rent a drum sander from a local hardware store rather than buying one. Rental runs about $60 to $80 per day, and most jobs finish in a weekend. Just practice on a closet floor first since drum sanders remove material fast.
For a detailed walkthrough, the step-by-step refinishing guide covers every stage with practical tips. And if you’re weighing whether refinishing is right for your specific floor type, reviewing hardwood flooring pros and cons for Bay Area homeowners gives you a balanced picture.
Comparing upgrade methods: install new vs refinish existing
Now that both paths are clear, the real question is which one makes sense for your home. The answer depends on the condition of your current floor, your style goals, and how much you want to spend.
Engineered hardwood offers an affordable install with decade-long value when you choose the right product and thickness. Refinishing, on the other hand, squeezes more life out of what you already have.
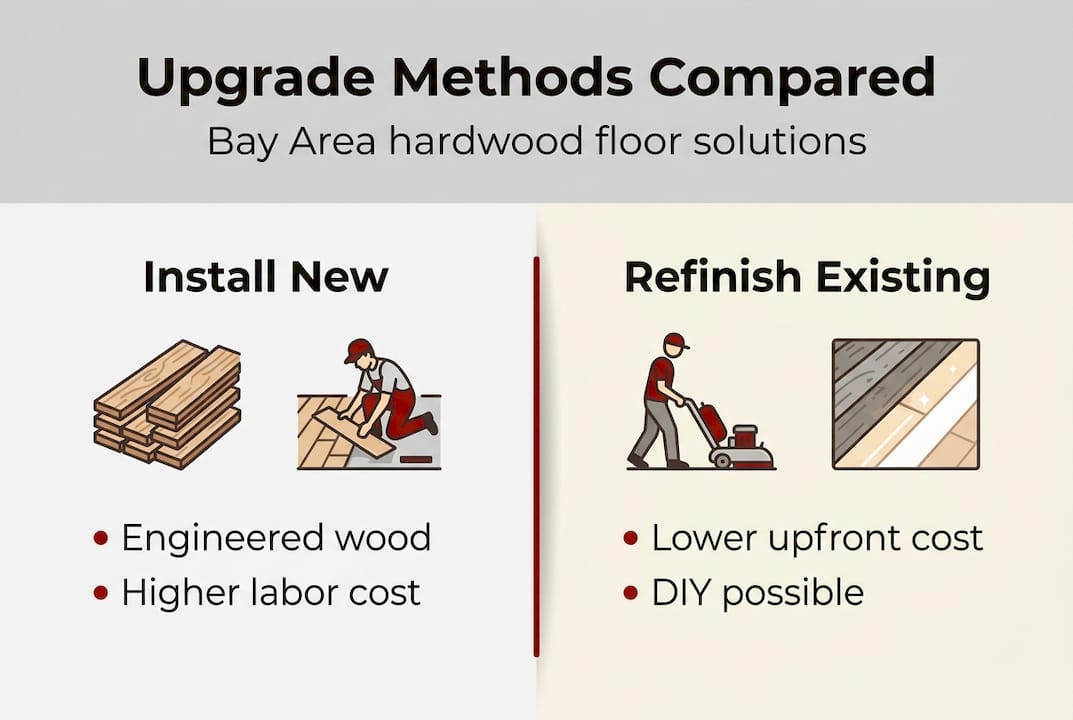
| Factor | Install new engineered | Refinish existing |
|---|---|---|
| Upfront cost | $6 to $15 per sq ft total | $2 to $5 per sq ft |
| Time to complete | 2 to 5 days | 2 to 3 days |
| Style flexibility | High (new color, species, width) | Moderate (new stain, same layout) |
| Disruption level | High (furniture removal, subfloor prep) | Moderate (furniture removal, dust) |
| Best for | Damaged or outdated floors | Structurally sound floors with surface wear |
Choose new installation if:
- Your existing floor has deep structural damage, rot, or boards that are too thin to sand
- You want a completely different look, species, or plank width
- You’re updating a room that previously had carpet or tile
Choose refinishing if:
- Your floor is solid hardwood or thick-veneer engineered with at least one refinish left
- The structure is sound but the surface looks dull, scratched, or dated
- You want the most budget-friendly option with the least disruption
For Bay Area homeowners focused on long-term value, durable hardwood for Bay Area conditions should always factor into the decision. A cheaper floor that warps or wears out in five years costs more in the long run than a slightly pricier option that lasts 25.
Get expert help upgrading your hardwood floors — Bay Area specialists
You’ve now got a clear picture of what affordable hardwood upgrades actually look like in the Bay Area. Whether you’re leaning toward new engineered floors or refreshing what you have, the next step is finding products and advice you can trust.
At Kapriz Hardwood Floors, we stock a wide hardwood floors selection built specifically for Bay Area homes, from budget-friendly engineered options to premium solid hardwood. We don’t sell anything we wouldn’t put in our own homes. If you’re not sure where to start, our team offers affordable flooring advice to help you balance quality and cost without guessing. And if you’re curious why so many Bay Area homeowners are choosing engineered, read up on why an engineered hardwood investment makes financial and practical sense for this climate.
Frequently asked questions
What is the cheapest way to upgrade hardwood floors without replacing them?
Refinishing is the most affordable option. Sanding, staining, and applying polyurethane can refresh worn floors for $2 to $5 per square foot, and refinishing adds up to 15 years of life to an existing floor.
Are engineered hardwood floors durable and affordable for Bay Area humidity?
Yes. Engineered is more stable in humid climates and costs less than solid wood upfront. Look for brands with veneers of 3mm or more and an aluminum oxide finish for the best durability.
How much does it cost to install new engineered hardwood?
Materials run $3 to $9 per square foot, and installation adds another $3 to $6. In the Bay Area, labor is 60 to 70% of the total project cost, so DIY floating installation can save you significantly.
Can I refinish engineered hardwood floors?
Engineered hardwood can be refinished 1 to 2 times if the veneer is 3mm or thicker. Thinner veneers will sand through to the core layer, so refinishing is not an option for those products.


