
Your guide to hardwood flooring upgrades for Bay Area homes
TL;DR:
- Choosing the right hardwood species, grade, and finish is crucial for long-term value and durability.
- Proper preparation, moisture control, and professional installation prevent costly mistakes and damage.
- Well-maintained hardwood floors significantly boost home appeal and resale value in the Bay Area.
Picking new floors for your Bay Area home can feel overwhelming. You’re juggling budget limits, resale expectations, coastal humidity, and a market where buyers notice every detail. Get it wrong and you’ve spent thousands on something that underperforms or looks dated in three years. Get it right and you’ve added real, measurable value to your home while making every room feel warmer and more inviting. This guide walks you through every stage, from planning and material selection to installation, aftercare, and the smart choices that actually pay off.
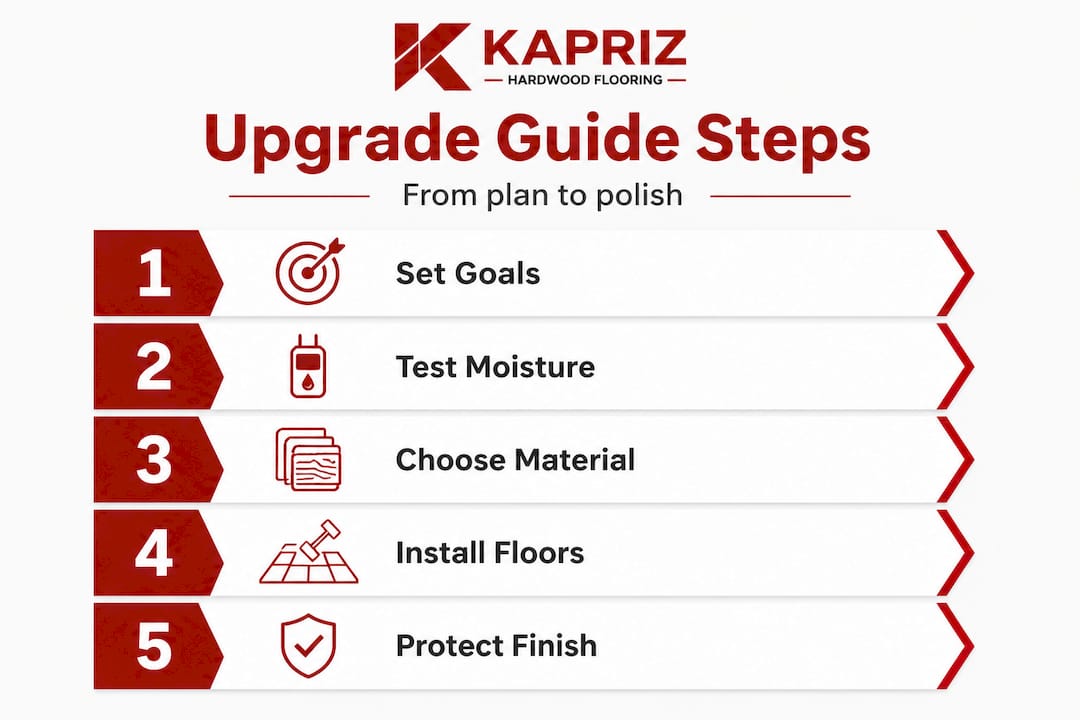
Table of Contents
- What to consider before upgrading your floors
- Bay Area hardwood choices: Materials, grades, and costs
- Step-by-step guide: Installing your new hardwood floors
- Common mistakes and how to avoid them
- How to maximize value: Aftercare and what buyers look for
- Why hardwood upgrades give Bay Area homes a real edge (if you do it smart)
- Ready for a smarter flooring upgrade?
- Frequently asked questions
Key Takeaways
| Point | Details |
|---|---|
| Plan with property goals | Identify whether you’re upgrading for resale, rental value, or lifestyle to steer product choices and budgets. |
| Match materials to needs | Bay Area homeowners should choose hardwood species and grades that balance cost, durability, and style. |
| Prep is everything | Proper preparation and professional installation can extend floor life and prevent costly repairs. |
| Avoid common pitfalls | Not acclimating wood or ignoring moisture issues are the biggest threats to value and appearance. |
| Focus on aftercare | Simple routines like prompt cleaning and periodic refinishing preserve appearance and appeal to buyers. |
What to consider before upgrading your floors
Before pulling up your old carpets, it’s crucial to step back and evaluate what you really need and want from a flooring upgrade.
The first question to ask yourself is: what’s the main goal? Are you upgrading to sell within the next year, to improve daily living, or to increase rental income? Each goal points you toward different choices. A homeowner planning to sell soon should prioritize neutral tones and proven materials that appeal to the widest buyer pool. Someone staying for a decade can afford to lean into personal style and premium finishes.
Budget is the next reality check. Most Bay Area homeowners budget between $6 and $15 per square foot for materials alone, with installation adding another $3 to $6 per square foot. Hidden costs catch people off guard: subfloor repairs, furniture moving, disposal fees, and trim replacement can add 15 to 25 percent to your initial estimate. The Bay Area home value flooring impact data shows that quality hardwood upgrades can return 70 to 80 percent of their cost at resale, which is among the highest returns of any home improvement project.
Here are the key factors to evaluate before you spend a dollar:
- Purpose: Resale, personal enjoyment, or rental income?
- Foot traffic: Households with kids and pets need harder species and tougher finishes.
- Moisture exposure: Kitchens, bathrooms, and below-grade spaces need engineered options.
- Timeline: Are you installing months before a sale or living with this for years?
- Style goals: Do you want a classic, modern, or rustic look?
Bay Area climate adds a layer of complexity that homeowners in drier inland regions don’t face. Coastal humidity fluctuates significantly between seasons, which causes wood to expand and contract. If you’re near San Francisco or the East Bay shoreline, engineered hardwood handles these shifts better than solid planks. Checking the 2026 Bay Area flooring trends can also help you align your choices with what local buyers currently want.
| Factor | Low priority | High priority |
|---|---|---|
| Resale timeline | Over 5 years away | Within 1 to 2 years |
| Moisture risk | Dry inland areas | Coastal or below-grade |
| Household wear | Adults only | Kids, pets, heavy traffic |
| Budget flexibility | Under $8/sq ft | $10+ per sq ft |
Pro Tip: Get a moisture reading of your subfloor before ordering any materials. A basic moisture meter costs under $30 and can save you from warping issues that cost hundreds to fix later.
Bay Area hardwood choices: Materials, grades, and costs
Once you understand your priorities, it’s time to zero in on the actual flooring options that meet your criteria.
Wood species matter more than most homeowners realize. Oak is the workhorse of residential hardwood. It’s widely available, takes stain beautifully, and scores a 1,290 on the Janka hardness scale (a standard measure of wood’s resistance to denting). Maple is harder at around 1,450 and gives a cleaner, more contemporary look. Walnut is softer at 1,010 but delivers rich, dark tones that photograph beautifully for listings. Hickory is one of the hardest domestic species at 1,820, making it ideal for high-traffic homes. Bamboo, while technically a grass, performs similarly to hardwood and offers an eco-friendly angle that resonates with many Bay Area buyers.
Hardwood grades affect both price and appearance:
- Clear grade: Nearly flawless, minimal knots, premium price. Best for formal spaces.
- Select grade: Slight variations in color and grain. Excellent balance of beauty and value.
- No. 1 common: Visible knots and character marks. Rustic appeal at a lower price point.
- No. 2 common: More pronounced variation. Budget-friendly and great for casual spaces.
The hardwood vs laminate cost in Bay Area breakdown shows that solid hardwood typically runs $8 to $14 per square foot installed, while quality laminate comes in at $4 to $8. The gap is real, but so is the difference in how buyers perceive each material during a home showing.
Prefinished vs. site-finished planks is another decision point. Prefinished boards arrive from the factory with a durable aluminum oxide coating. They install faster, off-gas less, and you can walk on them the same day. Site-finished floors are sanded and coated in place, giving you a completely seamless look with no micro-bevels between boards. They take three to five days to cure but allow full customization of stain color and sheen level.
For resale, hardwood color trends point toward light to medium warm tones, natural wire-brushed textures, and wide planks (5 inches and wider). These choices photograph well and appeal to the broadest range of buyers.
| Material | Cost per sq ft (installed) | Durability | Resale appeal |
|---|---|---|---|
| Solid oak | $9 to $13 | High | Very high |
| Engineered hardwood | $7 to $12 | High | High |
| Bamboo | $6 to $10 | Medium-high | Moderate |
| Quality laminate | $4 to $8 | Medium | Moderate |
Pro Tip: If your budget is tight, choose a No. 1 common grade oak in a wide plank format. The character marks read as intentional and stylish, and wide planks make rooms look larger, which is a genuine selling point.
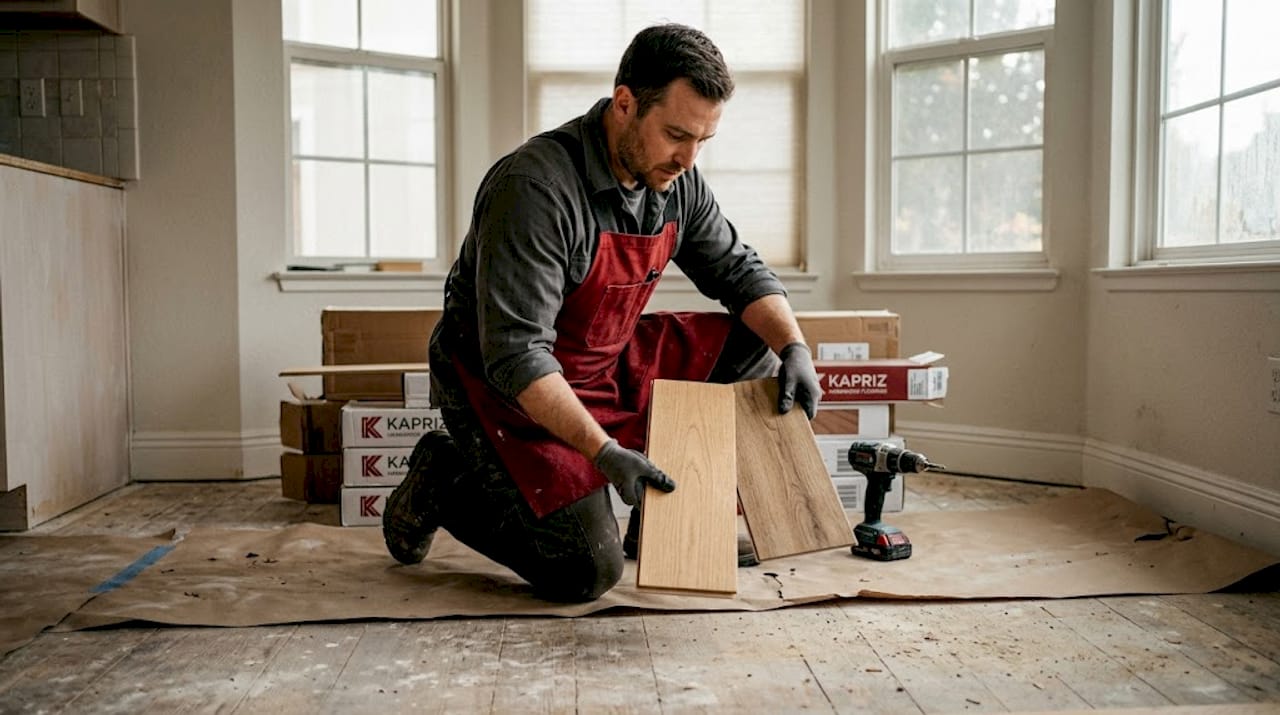
Step-by-step guide: Installing your new hardwood floors
With your materials chosen, let’s walk through what upgrading to hardwood looks like from the ground up, whether you’re hiring a contractor or rolling up your sleeves.
Preparation is everything. Skipping or rushing this phase is the single biggest cause of flooring failures. Follow these steps before a single plank goes down:
- Acclimate your materials. Stack the boxes in the room where they’ll be installed for at least 72 hours (and up to a week for solid hardwood). This lets the wood adjust to the room’s temperature and humidity. Skipping this step causes gaps or buckling after installation.
- Inspect and prep the subfloor. The subfloor must be clean, dry, and flat to within 3/16 of an inch over a 10-foot span. Sand down high spots and fill low spots with floor leveling compound. Check for squeaks and secure loose areas with screws.
- Check moisture levels. The subfloor moisture content should be within 2 to 4 percent of the hardwood’s moisture content. Use a reliable moisture meter and address any issues before proceeding. Detailed guidance on preparing for hardwood installation can walk you through the technical specifics.
- Gather your tools. You’ll need a miter saw, flooring nailer or stapler, tapping block, pull bar, spacers, chalk line, tape measure, and safety glasses.
- Dry-fit the first few rows. Lay out planks without fastening them to check the layout and ensure you won’t end up with a sliver of wood at the far wall.
- Install from the straightest wall. Start with a chalk line to keep your first row perfectly straight. This row sets the alignment for everything that follows.
- Nail or glue as required. Solid hardwood over wood subfloor uses a flooring nailer. Engineered hardwood can be glued, floated, or nailed depending on the product.
- Cut borders and transitions. Use a jigsaw for irregular cuts around door frames and transitions to other floor types.
- Install baseboards and transitions. These cover the expansion gap (typically 3/4 inch) that you must leave around the perimeter.
- Final inspection and cleaning. Walk the floor, check for squeaks, and clean with a manufacturer-approved product.
“Proper acclimation and subfloor prep account for roughly 80 percent of a successful hardwood installation. The actual nailing is the easy part.”
When to call a pro: If your subfloor has significant moisture issues, if you’re working with exotic species or wide planks over 5 inches, or if you’ve never used a flooring nailer, hiring a professional installer is the smarter move. Errors in installation are expensive and difficult to reverse.
Pro Tip: Rent a flooring nailer rather than buying one. Most tool rental shops carry them for $40 to $60 per day, which is far cheaper than purchasing a tool you’ll use once.
Common mistakes and how to avoid them
Even the best materials can underperform if common errors trip you up. Here’s what to watch for.
Ignoring moisture control is the most expensive mistake homeowners make. Wood and water are natural enemies. Even a small, slow leak under a refrigerator or dishwasher can cause cupping and buckling across an entire floor section. Install a vapor barrier on concrete subfloors and check plumbing connections before and after installation.
Skipping acclimation is a close second. Planks that go straight from a cold delivery truck to a warm room will expand after installation, causing buckling or tight joints that crack under pressure.
Neglecting finish and sealant choices affects both durability and appearance. Oil-based polyurethane is harder and more amber-toned. Water-based finishes dry faster and stay clearer. Matte and satin sheens are more forgiving of scratches and dust than high-gloss options, which is why most designers now recommend them for everyday living spaces.
Inconsistent installation patterns are a visual problem that’s hard to fix without pulling up boards. Random-length installations look more natural and professional than repeating patterns. Mix plank lengths deliberately to avoid H-joints (where end joints line up across multiple rows).
Using the wrong cleaning products after installation is surprisingly common. Avoid steam mops, wet mops, and anything with wax or oil soap on a polyurethane-finished floor. These products cloud the finish over time. The resale value of hardwood vs vinyl data consistently shows that well-maintained hardwood outperforms vinyl and laminate in buyer perception, so protecting your finish matters.
Pro Tip: Place felt pads under all furniture legs immediately after installation. Scratches from furniture dragging across a new floor are the most common complaint from homeowners in the first year.
How to maximize value: Aftercare and what buyers look for
After installation, it’s time to protect your investment and make the most of your new floors, especially if a sale is on your horizon.
Daily and weekly maintenance is simple but non-negotiable. Sweep or vacuum with a soft-bristle attachment at least twice a week to remove grit that acts like sandpaper underfoot. Wipe up spills immediately. Use a barely damp microfiber mop for deeper cleaning, and always use a cleaner approved for your specific finish.
Quick response to minor damage prevents small issues from becoming major ones. Light surface scratches can be buffed out with a hardwood floor scratch repair kit. Deeper gouges may need a wood filler that matches your stain. Address these within weeks, not months, to prevent moisture from working into exposed wood fibers.
Preventative steps for long-term durability:
- Use area rugs in high-traffic zones like hallways and in front of the kitchen sink.
- Keep indoor humidity between 35 and 55 percent year-round to minimize expansion and contraction.
- Trim pet nails regularly to reduce surface scratching.
- Avoid high heels on hardwood. A single stiletto heel concentrates more pressure per square inch than a car tire.
- Recoat the finish every 5 to 7 years before it wears through to bare wood.
What buyers actually look for in Bay Area listings: wide planks (5 inches or wider), light to medium warm tones, wire-brushed or hand-scraped textures, and consistent coloring throughout the main living areas. The maximizing floor upgrade value research confirms that open-plan homes with continuous hardwood flooring from the entryway through the living and dining areas command higher offers and spend fewer days on the market.
Pro Tip: If you’re prepping for a sale, a professional buff and recoat (not a full sand and refinish) costs $1 to $2 per square foot and can make 10-year-old floors look nearly new. It’s one of the highest-ROI pre-listing investments you can make.
Why hardwood upgrades give Bay Area homes a real edge (if you do it smart)
Here’s a perspective that most flooring guides won’t give you: the biggest risk in a Bay Area flooring upgrade isn’t choosing the wrong species. It’s making decisions based on short-term savings that cost you more within five years.
We’ve seen homeowners choose luxury vinyl plank because it’s cheaper and “looks just like hardwood.” And it does, in photos. But buyers who walk through a home feel the difference under their feet. They hear the hollow sound. They notice the way light catches the surface differently. These subtle cues register emotionally, even if buyers can’t articulate exactly what they’re noticing. The vinyl floor upgrades and home value research is telling: vinyl can actually reduce perceived value in higher-end Bay Area neighborhoods where buyers expect real wood.
The other pattern we see constantly is homeowners who cut corners on grade or finish, then spend more money fixing problems within three to five years. A No. 2 common grade floor installed without proper moisture control in a coastal home is going to show wear and movement faster than a well-installed select grade floor with proper prep. The upfront savings evaporate quickly.
What actually works? Choosing a species and grade that fits your real budget, installing it properly with correct subfloor prep, and maintaining it consistently. A well-cared-for oak floor installed 15 years ago still photographs beautifully and impresses buyers today. That’s the kind of return that makes hardwood one of the smartest upgrades you can make in this market.
Ready for a smarter flooring upgrade?
If you’ve made it this far, you’re already ahead of most homeowners who dive into a flooring project without a clear plan. The right materials, proper installation, and smart aftercare can transform your home and your bottom line.
At Kapriz Hardwood Floors, we carry everything from high-end luxury brands to genuinely affordable hardwood in Bay Area options, and every product we stock is something we’d install in our own homes. Whether you’re just starting to research or ready to order, our upgrade guide for Bay Area hardwood gives you even more detail on matching your goals to the right product. Browse our full selection and get real guidance from people who know Bay Area homes when you shop hardwood floors with us today.
Frequently asked questions
What hardwood flooring is best for Bay Area homes?
Engineered and high-grade solid hardwoods like oak and maple stand up well to Bay Area climate conditions and high daily use. The Bay Area cost guide breaks down which options perform best for each neighborhood type and budget.
What is the cost difference between hardwood and laminate flooring in the Bay Area?
Hardwood typically costs $8 to $14 per square foot installed versus $4 to $8 for quality laminate, but hardwood delivers significantly better resale value and buyer appeal. The hardwood vs laminate comparison shows the long-term math clearly favors hardwood for most Bay Area homeowners.
Does new hardwood flooring add more value than vinyl or laminate?
Yes, hardwood consistently ranks higher for both resale value and buyer interest compared to laminate or vinyl, particularly in the mid-to-upper Bay Area market.
Can I install hardwood floors myself, or should I hire a professional?
DIY installation is achievable for experienced homeowners, but the job preparation requirements for subfloor work and moisture control often make professional installation the smarter investment for most people.
Recommended
- Upgrade hardwood floors cheaply in the Bay Area: 2026 guide | Kapriz Hardwood Flooring Store
- Bay Area Hardwood Floors: Affordable Options & Upgrades | Kapriz Hardwood Flooring Store
- How to spot quality flooring: a guide for Bay Area homes | Kapriz Hardwood Flooring Store
- How to choose hardwood floors for your Bay Area home | Kapriz Hardwood Flooring Store


