
How to choose affordable floors balancing quality
Choosing the right flooring for your Bay Area home shouldn’t mean choosing between quality and affordability. Many homeowners assume high-quality hardwood floors are out of reach, but understanding durability ratings, material differences, and installation options opens up budget-friendly possibilities. Bay Area’s unique climate adds another layer of complexity, with humidity fluctuations affecting different flooring types in distinct ways. This guide walks you through practical strategies to select durable, attractive floors that fit your budget while standing up to daily wear and the region’s environmental challenges.
Table of Contents
- Assessing Your Flooring Needs And Budget
- Choosing The Right Flooring Type And Durability Factors
- Installation Options And Cost-Saving Strategies
- Maintaining Durability And Verifying Your Floor Investment
- Explore Premium Affordable Flooring Options With Kapriz Hardwood Floors
- Frequently Asked Questions
Key takeaways
| Point | Details |
|---|---|
| Durability ratings matter | Prioritize AC3-AC4 ratings for laminate and Janka hardness above 1300 for long-lasting performance |
| Engineered beats solid | Engineered hardwood handles Bay Area humidity better than solid wood while costing less |
| DIY saves significantly | Click-lock installation cuts labor costs by 50% without sacrificing quality |
| Climate considerations | Bay Area’s moisture levels require careful material selection to prevent warping and damage |
Assessing your flooring needs and budget
Before you step into a flooring showroom, nail down your total budget including both materials and installation. Total installed cost in Bay Area ranges $8-15 per square foot including labor, with solid hardwood hitting $10-14 per square foot. Understanding these numbers upfront prevents sticker shock and helps you allocate funds wisely.
High-traffic areas demand different considerations than bedrooms or home offices. Entryways, kitchens, and hallways need harder surfaces that resist scratches and dents from constant foot traffic, dropped items, and furniture movement. If you have kids or pets, factor in their impact on your floors when calculating durability requirements.
Bay Area’s humidity patterns create unique challenges for flooring materials. Coastal areas experience higher moisture levels year-round, while inland regions see dramatic seasonal swings. These fluctuations cause wood to expand and contract, making material choice critical for preventing gaps, cupping, or buckling. Consider your specific microclimate when evaluating options, as what works in San Francisco might not suit San Jose.
Pro Tip: Set aside an extra 10% of your material budget for waste, cuts, and subfloor preparation. This buffer covers unexpected issues like uneven concrete, damaged underlayment, or miscalculated square footage, preventing project delays and budget overruns.
Break down your priorities into must-haves versus nice-to-haves:
- Durability requirements based on household activity levels
- Aesthetic preferences including wood species, color, and finish
- Installation timeline and whether you’ll hire professionals or DIY
- Long-term maintenance commitment you’re willing to make
- Resale value considerations if you plan to sell within 5-10 years
Explore affordable hardwood flooring options for Bay Area homes that balance these factors without compromising on quality.
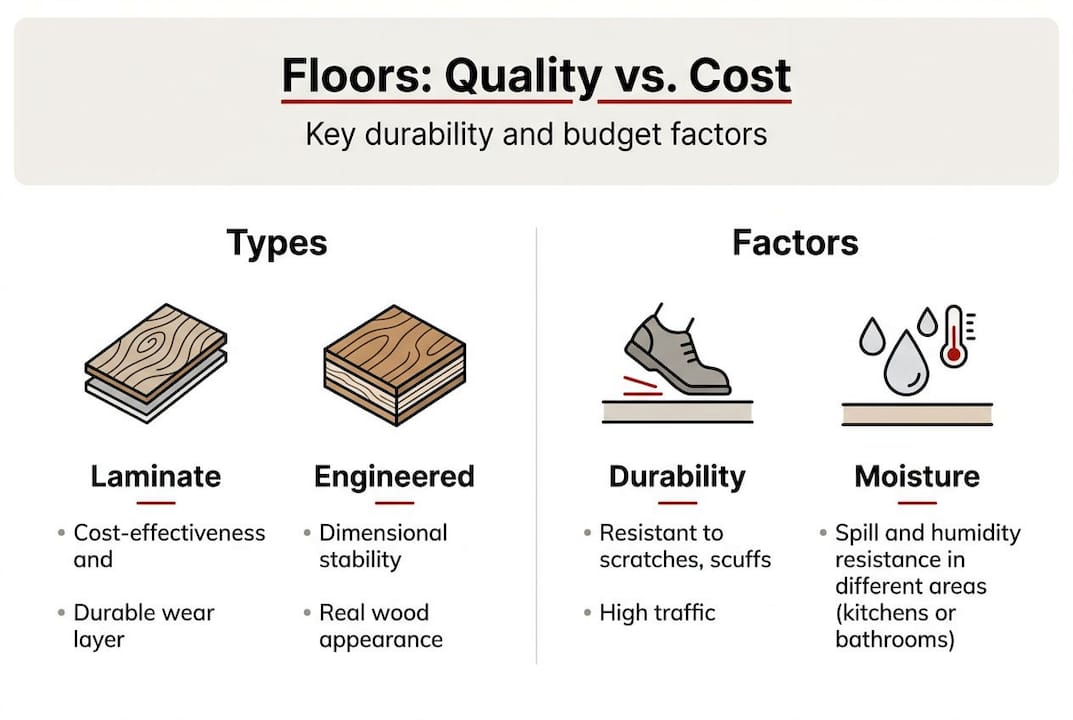
Choosing the right flooring type and durability factors
Understanding durability ratings transforms flooring shopping from guesswork into informed decision making. AC3-AC4 ratings for laminate and 2-3mm wear layers for engineered hardwood indicate residential-grade durability, while Janka hardness above 1300 ensures wood species resist denting from everyday impacts. These numbers aren’t marketing fluff, they predict how your floors will look after years of use.

Engineered hardwood consists of a real wood veneer over plywood layers, offering authentic wood appearance with superior dimensional stability. Solid hardwood is milled from single pieces of timber, providing refinishing potential but greater sensitivity to moisture. Laminate uses photographic images of wood over fiberboard, delivering budget-friendly durability without natural wood’s character. LVP (luxury vinyl plank) mimics wood through printed designs, offering waterproof performance at the cost of authentic feel.
| Flooring Type | Cost per sq ft | Janka/AC Rating | Bay Area Suitability | Refinishing |
| — | — | — | — |
| Engineered Hardwood | $6-10 | 1200-1500 | Excellent | 1-2 times |
| Solid Hardwood | $8-14 | 1000-1500 | Moderate | 4-7 times |
| Laminate | $3-7 | AC3-AC4 | Good | None |
| LVP | $4-8 | N/A | Excellent | None |
Engineered hardwood shines in Bay Area installations because its layered construction resists humidity-driven expansion better than solid planks. The cross-grain plywood core counteracts moisture movement, maintaining stable dimensions through seasonal changes. This stability prevents the gaps and cupping that plague solid hardwood in coastal climates, making engineered options both practical and cost-effective.
Pro Tip: European White Oak engineered flooring offers exceptional value, combining Janka hardness around 1360 with neutral tones that complement any design style. Its tight grain pattern hides minor scratches better than species with dramatic grain variations, extending the time between refinishing.
Compare engineered versus solid hardwood to understand which construction method suits your specific situation. For budget-conscious shoppers seeking authentic wood appearance, examine laminate versus LVP options that deliver hardwood aesthetics without premium pricing.
Wear layer thickness determines how many times you can refinish engineered hardwood. Budget options with 1mm wear layers offer single refinishing opportunities, while 3-4mm wear layers support multiple sandings. This distinction affects long-term value, as refinishing extends floor life by decades compared to replacement.
Installation options and cost-saving strategies
Professional installation typically adds $3-7 per square foot to material costs, but DIY installation of click-lock flooring cuts labor expenses by 50% for homeowners with basic tool skills. Click-lock systems feature tongue-and-groove edges that snap together without glue or nails, eliminating specialized equipment requirements. This floating installation method works over existing floors in many cases, further reducing prep work and costs.
Successful DIY installation follows these essential steps:
- Acclimate flooring materials in the installation room for 7-10 days to match ambient moisture levels
- Remove baseboards and undercut door jambs to allow planks to slide underneath
- Install moisture barrier or underlayment according to manufacturer specifications
- Start installation along the longest wall, maintaining 1/2 inch expansion gaps at all perimeters
- Stagger end joints by at least 12 inches between adjacent rows for structural integrity
- Use pull bars and tapping blocks to close joints without damaging edges
- Reinstall baseboards or add quarter-round molding to cover expansion gaps
Wood flooring must acclimate 7-10 days before installation to prevent post-installation movement. This waiting period allows planks to absorb or release moisture until they match your home’s humidity levels. Skipping acclimation leads to gaps in dry seasons or buckling in humid periods, as the wood adjusts after installation instead of before.
Pro Tip: Fill gaps and cracks in your subfloor with leveling compound before installing new flooring. Uneven surfaces telegraph through thin materials, creating squeaks, premature wear patterns, and visible imperfections. Spending an extra day on subfloor prep prevents thousands in future repairs.
Click-lock engineered hardwood and laminate are ideal DIY candidates because they require no adhesives, specialized tools, or professional expertise. Solid hardwood installation demands nail guns, moisture testing equipment, and experience with expansion calculations, making professional installation worth the investment. LVP offers the easiest DIY experience but may require scribing around complex room shapes.
Calculate your break-even point by comparing professional quotes against tool rental costs, your time value, and confidence level. A 500 square foot room might cost $2,000 professionally installed versus $800 for materials plus $200 in tool rentals for DIY, saving $1,000 if you complete the work over a weekend.
Maintaining durability and verifying your floor investment
Routine maintenance extends floor life dramatically while protecting your investment from premature wear. Simple practices preserve appearance and structural integrity for decades. Sweep or vacuum daily to remove abrasive dirt particles that scratch finishes with every footstep. Place mats at exterior doors to trap moisture and debris before they reach your floors. Use felt pads under furniture legs to prevent dents and scratches during movement.
Inspect wear layers on engineered hardwood by examining high-traffic areas for finish degradation or wood exposure. If you see bare wood showing through the finish, refinishing becomes urgent to prevent moisture damage to underlying layers. Laminate and LVP don’t refinish, so visible wear indicates replacement needs. Check for edge lifting, which signals moisture intrusion or installation issues requiring immediate attention.
Hardwood flooring boosts resale value 2.5-10% depending on quality and condition, with engineered hardwood particularly appealing to Bay Area buyers familiar with humidity challenges. Buyers recognize quality flooring as a significant upgrade that reduces their renovation costs and immediate maintenance needs. Well-maintained floors photograph beautifully in listings, attracting more showings and higher offers.
| Flooring Type | Daily Maintenance | Deep Cleaning | Damage Repair | Expected Lifespan |
|---|---|---|---|---|
| Engineered Hardwood | Sweep/vacuum | Damp mop monthly | Sand and refinish | 25-30 years |
| Solid Hardwood | Sweep/vacuum | Damp mop monthly | Sand and refinish | 50+ years |
| Laminate | Sweep/vacuum | Damp mop weekly | Replace planks | 15-25 years |
| LVP | Sweep/vacuum | Wet mop weekly | Replace planks | 10-20 years |
Avoid excessive water when cleaning wood floors, as standing moisture penetrates seams and causes swelling, cupping, or mold growth. Use barely damp mops or specialized hardwood cleaners that evaporate quickly without leaving residue. Never use steam cleaners on wood or laminate, as the heat and moisture combination destroys adhesives and finishes.
Protect floors from direct sunlight using window treatments, as UV rays fade wood and laminate finishes unevenly. Area rugs in sunny spots prevent discoloration while adding design interest. Rotate rugs periodically to ensure even aging across the entire floor surface.
Understand your floor’s warranty coverage and maintenance requirements to avoid voiding protection. Most manufacturers require specific cleaning products and prohibit certain practices like wet mopping solid hardwood or using oil soaps on factory finishes. Document your maintenance routine with photos and receipts in case warranty claims arise.
Learn more about investing in quality flooring that elevates both your daily living experience and long-term home value.
Explore premium affordable flooring options with Kapriz Hardwood Floors
Finding the perfect balance between quality and affordability doesn’t require endless research or compromise. Kapriz Hardwood Floors specializes in curating flooring options that meet Bay Area homeowners’ unique needs without breaking the bank. Our selection spans from budget-friendly engineered options to premium solid hardwood, all vetted for durability and value.
Our team understands Bay Area’s climate challenges and helps match flooring types to your specific microclimate, usage patterns, and aesthetic preferences. We stock European White Oak, domestic species, and exotic woods across multiple hardwood flooring grades to fit every budget. Whether you’re tackling a DIY installation or working with contractors, we provide expert guidance on material selection, acclimation, and maintenance.
Explore our comprehensive hardwood floors collection featuring engineered and solid options that deliver lasting beauty. Discover types of hardwood flooring with quality options for every budget, from entry-level to luxury grades.
At Kapriz Hardwood Floors, we believe everyone deserves beautiful, durable floors regardless of budget constraints. We never compromise on quality to save a few dollars, and we only sell products we’d install in our own homes. Visit our showroom to see samples, discuss your project requirements, and find affordable solutions that exceed your expectations.
Frequently asked questions
How durable is AC4 rated laminate compared to engineered hardwood?
AC4 rated laminate provides excellent scratch and impact resistance for busy households, handling heavy foot traffic and furniture movement without visible wear for 15-25 years. Engineered hardwood with 2-3mm wear layers offers comparable durability with the advantage of refinishing once or twice to restore appearance. Choose laminate for maximum scratch resistance in high-traffic areas or engineered hardwood when authentic wood character and refinishing potential matter more than absolute scratch immunity.
Can I install laminate or engineered hardwood flooring myself?
DIY installation of click-lock laminate and engineered flooring is absolutely feasible for homeowners with basic tool skills, potentially saving 50% on labor costs. The key to success lies in proper acclimation for 7-10 days and thorough subfloor preparation, including filling gaps and ensuring level surfaces. Follow manufacturer instructions precisely regarding expansion gaps, underlayment requirements, and installation patterns. Most homeowners complete a 500 square foot room over a weekend using rented tools like pull bars, tapping blocks, and jamb saws.
What flooring type is best for Bay Area humidity?
Engineered hardwood outperforms solid hardwood in Bay Area installations due to its layered construction that resists moisture-driven expansion and contraction. The cross-grain plywood core maintains dimensional stability through seasonal humidity swings, preventing the gaps and cupping common with solid planks in coastal climates. LVP offers complete waterproof protection for bathrooms and basements but lacks the authentic wood feel and refinishing potential that makes hardwood a long-term investment. For living areas, engineered hardwood provides the ideal balance of moisture resistance, natural beauty, and durability.
How much should I budget for quality flooring in the Bay Area?
Budget $8-15 per square foot installed for quality flooring in the Bay Area, with engineered hardwood typically falling in the $6-10 range for materials plus $3-5 for professional installation. Solid hardwood costs more at $8-14 per square foot for materials due to its single-piece construction and refinishing potential. Add 10% to your material budget for waste, cuts, and subfloor preparation to avoid mid-project shortfalls. DIY installation of click-lock products cuts labor costs in half, bringing total costs down to $6-12 per square foot for most projects.
Does hardwood flooring increase home resale value?
Hardwood flooring increases Bay Area home resale value by 2.5-10% depending on quality, condition, and overall market conditions. Buyers view hardwood as a premium feature that reduces their immediate renovation costs and enhances home aesthetics. Engineered hardwood appeals particularly to Bay Area buyers who understand local humidity challenges and appreciate its superior moisture resistance compared to solid planks. Well-maintained floors photograph beautifully in listings, attract more showings, and justify higher asking prices. The investment in quality flooring typically returns 70-80% of costs at resale, with the remaining value enjoyed through years of daily use.


