
Soundproofing Hardwood Floors for a Quieter Bay Area Home
TL;DR:
- Hardwood floors can significantly transmit impact and airborne noise, but proper soundproofing strategies can reduce this. Combining floating installation, dense underlayment, and ceiling treatments provides the best noise reduction. Eco-friendly options like cork and recycled rubber offer effective, sustainable solutions for Bay Area homeowners.
Hardwood floors have a reputation for being loud, but that reputation is largely undeserved when the right strategies are in place. In Bay Area homes, especially multi-level condos and Victorian houses with thin floors between units, noise is a daily frustration that affects sleep, focus, and even relationships with neighbors. The good news is that modern soundproofing methods, from high-density rubber underlayments to floating floor installations, can dramatically reduce both footstep noise and airborne sound. This guide walks you through exactly what works, what doesn’t, and how to match the right solution to your specific home.
Table of Contents
- Why do hardwood floors transmit noise?
- Key soundproofing methods for hardwood floors
- Choosing the right soundproofing material: rubber, cork, and more
- Common mistakes and practical tips for effective soundproofing
- A local perspective: what most Bay Area homeowners miss about soundproofing hardwood floors
- Get professional help for your hardwood floor soundproofing project
- Frequently asked questions
Key Takeaways
| Point | Details |
|---|---|
| Floating floor plus underlayment | This combination is the most effective system for reducing noise in hardwood floor installations. |
| Rubber and cork outperform foam | Denser materials like rubber or cork block more sound than standard foam underlayments. |
| Eco-friendly options available | Sustainable underlayments such as recycled rubber and cork provide strong soundproofing with green benefits. |
| Proper installation is critical | Avoid errors such as compressing underlayment or ignoring door clearance for best results. |
Why do hardwood floors transmit noise?
Before you can fix a noise problem, you need to understand what kind of noise you’re actually dealing with. Not all noise travels the same way, and treating the wrong type means wasting money on materials that won’t help.
There are two main categories of sound in any home:
- Structure-borne noise (also called impact noise): This happens when something physically contacts the floor, like footsteps, dropped objects, or chair legs scraping across the surface. The vibration travels through the floor structure and radiates as sound in the room below.
- Airborne noise: This is sound that travels through the air, like voices, music, or TV. It hits the floor surface, causes it to vibrate slightly, and those vibrations continue through the structure.
Hardwood is particularly prone to transmitting both types because it’s a rigid, dense material with very little natural vibration absorption. When your foot hits a solid hardwood plank, the energy has nowhere to go except straight down into the subfloor and joists. In a single-story home this barely matters, but in a two-story house or a condo above another unit, it’s a serious issue.
Here’s something most homeowners don’t realize: the ratings that manufacturers print on their underlayment packaging are measured in ideal laboratory conditions. In the real world, field ratings are typically 5 points lower than lab results, and floating floors consistently outperform nail-down and glue-down installations for soundproofing. That gap matters a lot when you’re comparing products side by side at the store.
Hardwood also amplifies sound through its flat, hard surface. Unlike carpet, which absorbs and scatters sound waves, a hardwood floor reflects sound back into the room. This creates the hollow, echoey quality that many homeowners notice after switching from carpet to wood.
“The structure of the floor assembly, not just the surface material, determines how much sound passes between levels. Treating only the top layer leaves most of the problem unsolved.”
You can find helpful noise reduction tips specifically for hardwood homes that expand on this concept. The takeaway here is that soundproofing hardwood floors isn’t about finding a magic product. It’s about understanding the path sound takes through your home and interrupting that path at multiple points.
Key soundproofing methods for hardwood floors
Now that you understand the problem, let’s look at what actually works. There are three main strategies, and the best results come from combining at least two of them.
1. Choose a floating floor installation
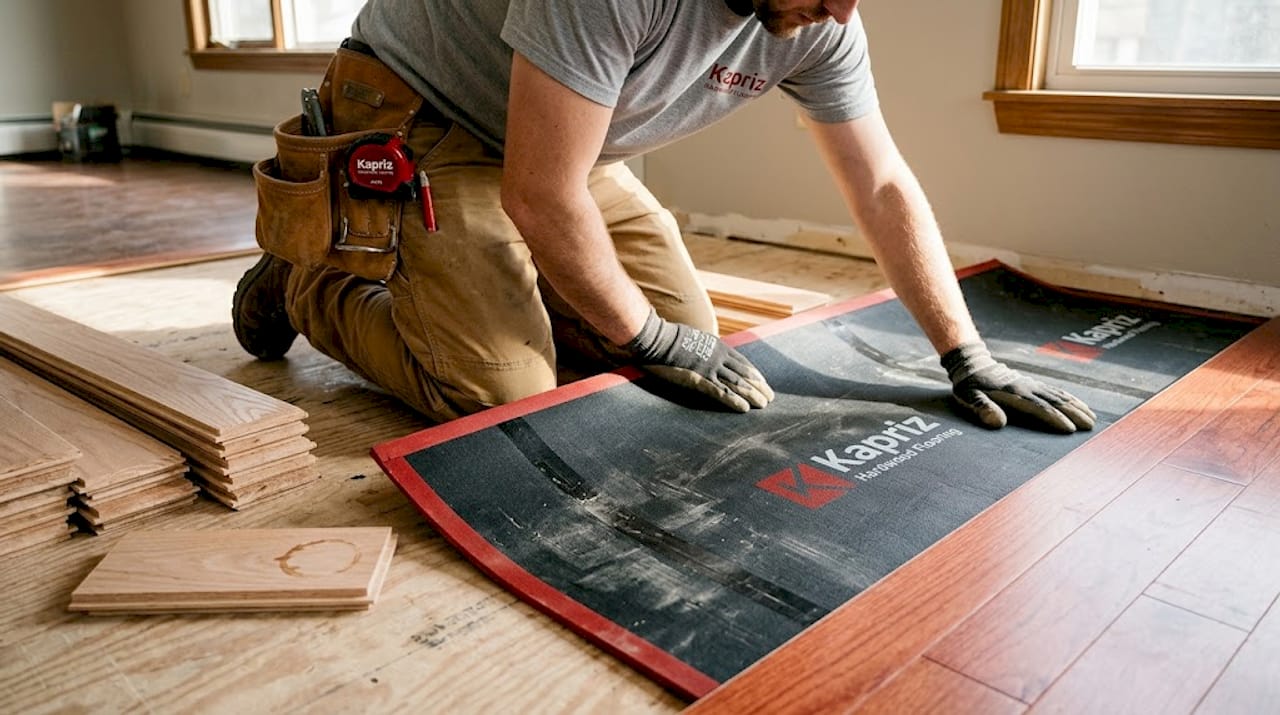
The way your floor is attached to the subfloor makes a huge difference. In a glue-down or nail-down installation, the hardwood is physically connected to the subfloor, creating a rigid bridge for vibrations to cross. In a floating installation, the planks lock together and rest on top of the subfloor without being fastened to it. This gap, usually filled with underlayment, breaks the vibration path.
Different installation methods have different acoustic profiles, and floating consistently wins for noise control. It works especially well with engineered hardwood, which is dimensionally stable enough to handle the floating method without warping.
2. Use the right underlayment
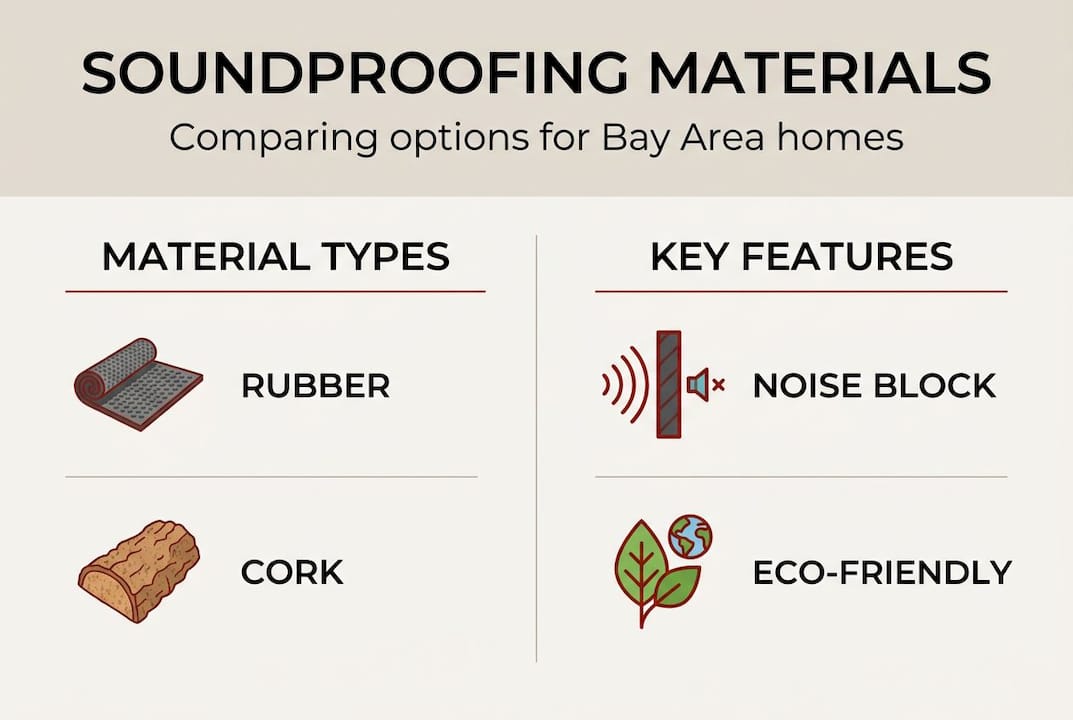
Underlayment is the material that sits between your hardwood planks and the subfloor. It’s the single most impactful addition you can make for soundproofing. The main types are foam, rubber, cork, and fiber, and each has a different acoustic performance level.
Denser underlayments like rubber are superior for sound reduction, though they cost more than foam options. The density is what matters most. A thin rubber pad outperforms a thick foam pad almost every time because rubber absorbs vibration better than foam, which tends to compress and lose effectiveness over time.
Research confirms this. Floating floors paired with underlayment can improve the IIC (Impact Insulation Class) rating by up to 28 dB, which is a massive real-world improvement. For reference, a 10 dB improvement is generally perceived as cutting the noise in half.
3. Treat the ceiling below
This one gets overlooked constantly. Even with perfect underlayment and a floating installation, some sound will still travel through the joists. Adding acoustic insulation or resilient channels to the ceiling of the room below captures that remaining noise before it reaches the ears of whoever is in that space. For serious noise problems in multi-level Bay Area homes, ceiling treatment is what takes you from “good” to “great.”
Here’s a quick comparison of the main underlayment materials:
| Material | IIC Performance | Cost | Best For |
|---|---|---|---|
| Rubber | Excellent | High | Floating, multi-level |
| Cork | Very good | Medium | Eco-conscious buyers |
| Fiber/felt | Good | Medium | Engineered hardwood |
| Foam | Moderate | Low | Budget, single-level |
Pro Tip: Never compress your underlayment during installation. Walk it out gently and let it settle before laying planks. A compressed underlayment loses most of its acoustic value and won’t recover its original thickness.
Check these underlayment tips before purchasing to make sure you’re matching the product to your specific floor type and installation method.
Choosing the right soundproofing material: rubber, cork, and more
Once you’ve committed to using underlayment and a floating installation, the next decision is which material fits your home, your values, and your budget. This is where Bay Area homeowners often have additional priorities that matter in the selection process.
Rubber underlayment is the top performer for sound absorption, especially for impact noise. It’s dense, durable, and doesn’t compress over time the way foam does. The main drawbacks are cost and environmental impact, though recycled rubber options exist and are widely available. If you live above another unit and footstep noise is your primary concern, rubber is the most reliable choice.
Cork underlayment is a standout for eco-conscious Bay Area homeowners. Cork is harvested from the bark of cork oak trees without cutting them down, making it one of the most sustainable flooring materials available. It also has natural sound absorption properties that make it effective at dampening both impact and airborne noise. It’s a genuinely good choice for those who want to align their home improvements with their environmental values.
Fiber and felt underlayments strike a balance between performance and cost. They work especially well under engineered hardwood because they provide moisture management alongside acoustic benefits. If you’re working with engineered wood over a concrete subfloor, fiber underlayment is often the recommended choice.
Foam underlayment is the most affordable option but also the least effective for serious noise issues. It’s fine for single-level homes where noise isn’t a concern, but in a multi-level Bay Area home, foam alone won’t cut it.
Here’s how the options compare across key factors:
| Material | Eco-friendly | Noise reduction | Moisture resistance | Cost per sq ft |
|---|---|---|---|---|
| Rubber (recycled) | Yes | Excellent | High | $$$ |
| Cork | Yes | Very good | Medium | $$ |
| Fiber/felt | Partially | Good | High | $$ |
| Foam | No | Moderate | Low | $ |
Sustainable materials like recycled rubber or wool can deliver 17 to 18 dB gains in soundproofing, which is competitive with conventional options and meaningful for real-world noise reduction.
Rubber underlayment is the strongest performer for overall sound absorption, but cork hits a sweet spot for Bay Area buyers who want solid acoustic performance without sacrificing sustainability. Cork is also a natural material that supports better indoor air quality, which matters in tightly built modern homes.
For those who are weighing flooring material options themselves, the cork vs. bamboo comparison covers how different floor types affect acoustics and eco impact. If you want to explore the full range of Bay Area eco options for sustainable flooring, there’s plenty of in-depth guidance available specifically for this region.
Pro Tip: If you’re selecting underlayment for engineered hardwood, confirm that your flooring manufacturer approves the specific product you’re considering. Using an unapproved underlayment can void your warranty, especially with floating installations.
Common mistakes and practical tips for effective soundproofing
Even homeowners who invest in quality materials often undermine their results through avoidable mistakes. Here are the most common ones and how to sidestep them.
-
Compressing the underlayment during installation. Rolling heavy objects across the underlayment before laying planks flattens it and destroys its acoustic properties. Unroll it carefully, let it adjust to room temperature, and lay it flat without stacking anything on top.
-
Choosing thickness over density. It’s tempting to think that a thicker underlayment equals better soundproofing. It doesn’t. Thicker is not always better; door clearance and manufacturer warranty requirements need to be factored in, and what matters most is the density of the material, not its depth.
-
Skipping the ceiling treatment below. If you only treat the floor and ignore the ceiling of the room below, you’re leaving a major noise pathway open. Resilient channels or acoustic insulation in that ceiling can capture the vibration that passes through even a well-installed floor assembly.
-
Ignoring the subfloor condition. Underlayment can’t compensate for a bouncy, uneven, or damaged subfloor. A squeaky or flexing subfloor transmits more vibration to the structure, making every other soundproofing measure less effective. Make sure you’re prepping your subfloor correctly before any installation begins.
-
Not accounting for door clearance. Adding underlayment increases the finished floor height. If you’re not careful, doors won’t open properly after installation. Measure the gap between the floor and the door bottom before choosing your underlayment thickness.
“The most effective soundproofing is a system, not a single product. Combining a floating installation, a dense underlayment, and ceiling treatment in the room below gives you layers of noise interruption that no single fix can match.”
When you’re ready to move forward, reviewing installing wood flooring best practices will help you understand what a professional installer should be doing at each step. Getting the installation right from the start is much cheaper than fixing problems after the fact.
Pro Tip: Always ask your installer what the real-world field rating of your chosen underlayment is, not just the lab-tested IIC score. The real-world number is what you’ll actually experience in your home.
A local perspective: what most Bay Area homeowners miss about soundproofing hardwood floors
Here’s what we’ve seen again and again working with Bay Area homeowners: people focus intensely on the floor itself and completely forget that sound travels through walls, joists, and ceilings too. You can install the most advanced rubber underlayment on the market, but if the walls between units share a stud wall with no insulation, noise is still going to travel.
The most successful soundproofing projects we’ve seen treat the floor as one piece of a larger system. That means having a conversation with your contractor about the whole floor assembly, including what’s above, below, and beside your living space.
Bay Area homeowners also tend to assume that eco-friendly means acoustic compromise. That’s simply not true anymore. Recycled rubber and cork options perform at the top of the range, and choosing eco-friendly flooring choices doesn’t mean sacrificing the quiet home you’re after.
Finally, soundproofing is an investment in your home’s market value. In a competitive Bay Area real estate market, a quieter, better-built home commands a real premium. It’s worth doing it right.
Get professional help for your hardwood floor soundproofing project
Achieving real, lasting noise reduction in a Bay Area home takes the right products and the right installation. At Kapriz Hardwood Floors, we work with homeowners across the region to match the best hardwood floor options to their noise reduction goals and budget, without cutting corners on materials or technique.

Whether you’re outfitting a single room or planning whole-home wood solutions, our team brings local knowledge and product expertise to every project. If you’re in the South Bay, our South San Francisco hardwood experts are ready to help you find the right soundproofing setup for your specific home layout. Reach out today and let’s build something quieter together.
Frequently asked questions
What is the best underlayment for soundproofing hardwood floors?
Rubber underlayment is superior for sound absorption overall, but cork and high-density fiber are strong alternatives depending on your budget and environmental priorities.
Can you completely soundproof a hardwood floor?
Complete soundproofing is nearly impossible in a standard residential structure, but floating floors improve IIC by up to 28dB when paired with underlayment and ceiling treatment, which is a dramatic real-world improvement.
Should I choose thicker underlayment for better soundproofing?
Not necessarily. Thicker is not always better because door clearance, warranty requirements, and compression under load all affect performance. Density is more important than thickness.
Is cork underlayment eco-friendly and effective for noise reduction?
Yes. Cork is eco-friendly with strong natural sound absorption, making it a smart choice for Bay Area homeowners who want both acoustic performance and sustainability.
Does soundproofing hardwood floors add value to my home?
Yes, especially in multi-level Bay Area homes where noise is a known quality-of-life issue. Better noise control increases comfort and can be a meaningful selling point in a competitive real estate market.


