
How to refinish hardwood floors: step-by-step guide 2026
Dull, scratched hardwood floors make Bay Area homes feel tired and outdated. You don’t need to rip them out and start over. Refinishing restores beauty and boosts home value at a fraction of replacement cost. This guide walks you through every step to bring your floors back to life with professional results.
Table of Contents
- Prerequisites: Assessing Your Hardwood Floor And Preparation
- Step 1: Choosing The Right Refinishing Method (Screening Vs Sanding)
- Step 2: Sanding And Surface Preparation
- Step 3: Staining And Applying Finish
- Step 4: Common Mistakes And Troubleshooting
- Step 5: Expected Results, Costs, And Maintenance
- Upgrade Your Floors With Kapriz Hardwood Flooring Store
- FAQ
Key takeaways
| Point | Details |
|---|---|
| Assessment first | Check floor condition with water test and thickness measurement before starting work. |
| Method matters | Screening works for light wear; sanding handles deep scratches and stains effectively. |
| Dust control critical | Proper containment and ventilation prevent health risks and reduce cleanup time significantly. |
| Finish selection | Oil-based offers durability; water-based dries faster with fewer fumes for quick turnaround. |
| Cost savings | Refinishing runs 30-50% less than replacement and typically completes in 3-5 days total. |
Prerequisites: assessing your hardwood floor and preparation
Before you touch a sander, you need to know if your floors can handle refinishing. Test floor finish durability with a water drop test by placing a few drops on the surface. If water beads up, the finish is intact. If it soaks in within minutes, the finish is worn. Next, check thickness. Your hardwood needs at least 3mm of wear layer to survive sanding without exposing subflooring.
Gather your tools before starting. You’ll need a drum sander for main areas, an edger for corners, sandpaper in multiple grits (36, 60, 80, 120), your chosen finish product, applicators, and safety gear including respirator, goggles, and hearing protection. Don’t skip the safety equipment. Sanding generates fine particles that damage lungs fast.
Clear every piece of furniture from the room. Seal heating and cooling vents with plastic and tape to prevent dust from spreading through your home. Remove floor registers and cover doorways with plastic sheeting. This containment saves hours of cleanup later. Take down any molding carefully and label each piece for easy reinstallation.
Proper ventilation makes the job safer and more comfortable. Open windows and set up fans to create airflow that directs fumes outside. If you’re working in winter, plan for shorter work sessions to balance ventilation with heat loss. Consider how Bay Area hardwood trends influence finish choices for your specific wood species.
Pro Tip: Take photos of molding placement and label hardware with painter’s tape before removal. You’ll thank yourself during reinstallation when everything goes back exactly where it belongs.
Essential preparation checklist:
- Complete water drop test and thickness measurement
- Rent or purchase drum sander and edger with appropriate grits
- Buy finish product (2-3 coats worth), applicators, and safety gear
- Clear room completely and seal all vents and doorways
- Remove molding and label each piece for reinstallation
- Set up ventilation system with fans and open windows
Step 1: choosing the right refinishing method (screening vs sanding)
Your floor’s condition determines whether you screen or sand. Get this decision wrong and you’ll waste time, money, or damage your floors permanently. Screening removes just the top polyurethane layer, making it perfect for floors with surface scratches but intact finish underneath. It’s faster, creates minimal dust, and costs less.
Sanding removes finish and a thin wood layer for heavily damaged floors with deep gouges, dark stains, or worn-through finish. This method takes longer, produces substantial dust, and requires more skill. But it’s your only option when screening won’t cut deep enough to fix the damage.
Screening typically takes one day and creates about 10% of the dust that sanding produces. You can apply new finish the same day after vacuuming. Sanding requires three to four days including multiple grit passes and thorough cleaning between stages. The dust volume reaches over 50 pounds per 1,000 square feet without proper containment.
Many homeowners try screening first when they’re unsure. If the screening pad reveals bare wood or deep scratches remain visible, you know you need to sand instead. This test run costs little and prevents the mistake of sanding unnecessarily. Review common flooring fail trends and fixes to avoid choosing the wrong method.
Screening vs sanding comparison:
| Factor | Screening | Sanding |
|---|---|---|
| Process | Abrasive pad removes finish only | Progressive grits remove finish and wood layer |
| Dust level | Minimal (manageable with shop vac) | Heavy (requires containment system) |
| Time required | 1 day including finish | 3-4 days including all grits and finish |
| Best for | Light wear, surface scratches, intact finish | Deep scratches, stains, worn-through finish, color change |
| Skill level | Beginner friendly | Intermediate to advanced |
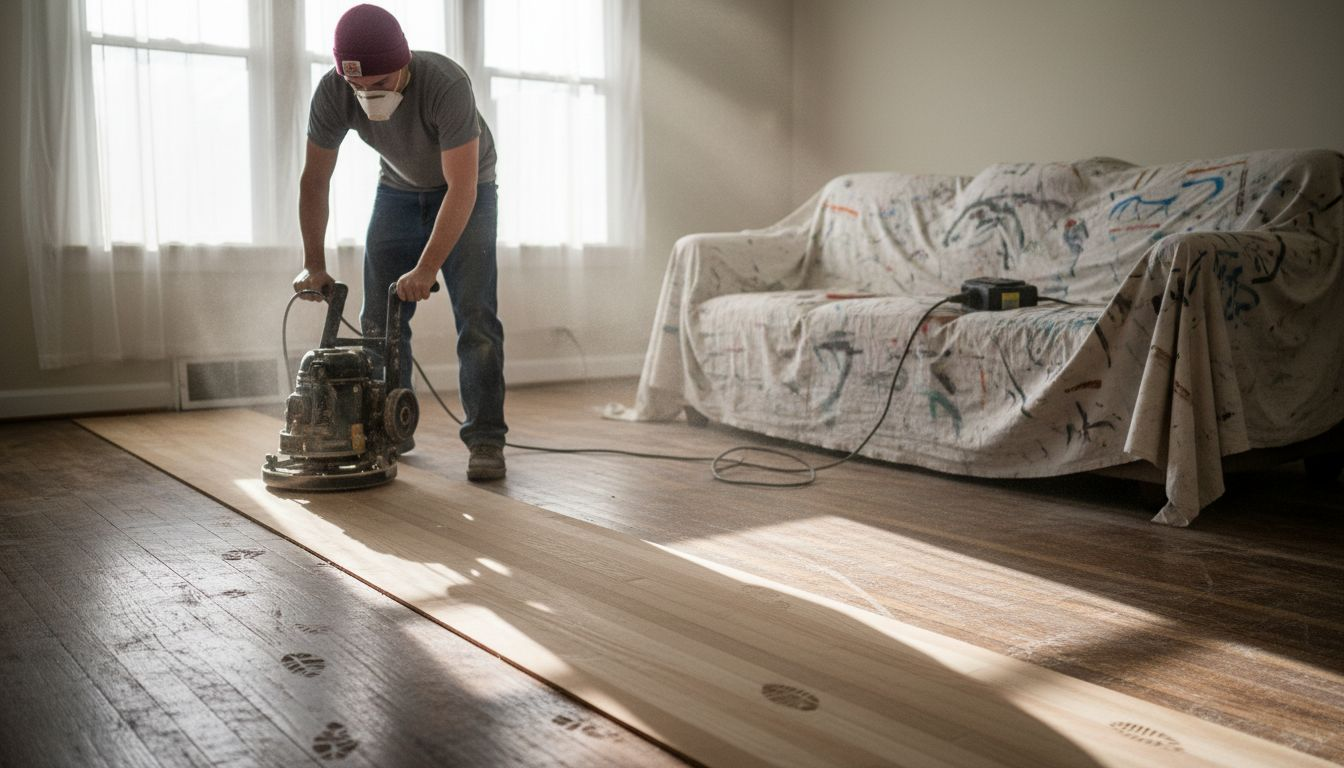
Step 2: sanding and surface preparation
Sanding transforms damaged floors but demands attention and constant motion. Load your drum sander with 36-grit paper for the first pass. Start the machine while it’s tilted back, then lower it as you walk forward at a steady pace. Never stop moving while the drum contacts the floor or you’ll create deep divots that show through the finish.
Work with progressively finer grits from 36 to 120 for optimal smoothness. After the 36-grit removes old finish and levels the surface, switch to 60-grit to remove the scratches from the coarse paper. Follow with 80-grit, then finish with 120-grit for the smoothest surface. Each grit removes the scratches from the previous one while creating finer scratches of its own.
Use the edger for areas the drum sander can’t reach: along walls, in corners, around obstacles. Match your edger grit to your drum sander grit at each stage. Edge work requires a lighter touch than drum sanding. Too much pressure creates swirl marks that telegraph through the finish.
Dust containment protects your health and your home. Sanding creates significant dust that settles everywhere and damages lungs with repeated exposure. Rent a sander with built-in dust collection or attach a shop vacuum to capture particles at the source. Wear a properly fitted respirator rated for fine particles, not just a dust mask.
Vacuum thoroughly between each grit change. Leftover coarse particles get pressed into the wood by finer grits, creating scratches that show up after finishing. Use a shop vacuum on the floor, then wipe with a tack cloth to grab remaining dust. This extra step takes five minutes but prevents finish problems that take hours to fix.
Pro Tip: Sand diagonally across the grain with your coarsest grit (36) to level uneven boards faster, then sand with the grain for all remaining grits to eliminate cross-grain scratches.
Sanding can produce over 50 pounds of dust per 1,000 square feet without proper containment systems. That’s a serious respiratory health risk requiring professional-grade protection and ventilation throughout the entire process.
Sanding sequence:
- Load drum sander with 36-grit paper and sand entire floor with the grain
- Edge all perimeter areas and corners with matching 36-grit
- Vacuum floor completely and wipe with tack cloth
- Repeat steps 1-3 with 60-grit, then 80-grit, then 120-grit
- Final vacuum and tack cloth before any finish application
- Inspect for missed spots or uneven areas before proceeding
Explore fixes for common hardwood issues if you discover problems during sanding that require special attention.
Step 3: staining and applying finish
Staining is optional but popular for matching existing decor or refreshing your floor’s appearance. Test your chosen stain color on an inconspicuous area or scrap piece first. Wood species react differently to stain. What looks perfect on oak might appear muddy on maple. Apply stain with clean rags or brushes in smooth, even strokes following the grain. Remove excess immediately to prevent blotching.
Wait for complete stain drying before applying finish. Check the manufacturer’s recommended dry time, usually 8 to 24 hours depending on humidity and temperature. Applying finish over damp stain creates adhesion problems and cloudy appearance that ruins your work.
Oil-based polyurethane offers durability and warm glow that many homeowners prefer. It penetrates deeply, resists scratches well, and develops a rich amber tone over time. The tradeoff is longer drying time (8-12 hours between coats) and strong fumes requiring excellent ventilation. Plan for three coats minimum.
Water-based finishes dry faster and emit fewer odors, making them ideal for occupied homes. You can apply multiple coats in one day and move furniture back sooner. They maintain the wood’s natural color without amber tinting. The downside is potentially less durability than oil-based products, though modern formulations have narrowed this gap significantly.
Apply finish in thin, even coats using a lambs wool applicator or synthetic pad. Work from the far corner toward your exit to avoid trapping yourself. Overlap each pass slightly to prevent lines. Let each coat dry completely, then sand lightly with 220-grit paper to remove dust nibs and create mechanical adhesion for the next coat. Vacuum and tack cloth between every coat.
Follow drying times religiously. Rushing creates soft, tacky finish that never fully hardens. Most products need 24-48 hours before light foot traffic and 72 hours minimum before furniture. Understanding hardwood issues and solutions helps you anticipate and prevent finish failures.
Finish options comparison:
- Oil-based polyurethane: Maximum durability, warm amber tone, 8-12 hour dry time, strong fumes, deeper wood protection
- Water-based polyurethane: Fast 2-4 hour dry time, low odor, maintains natural wood color, easier cleanup, slightly less durable
- Oil-modified urethane: Balances oil durability with reduced fumes, medium dry time, good for high-traffic areas
- Penetrating oil: Easy application, natural appearance, requires more frequent reapplication, simple touch-up repairs
Staining and finishing steps:
- Apply stain test patch in closet or under furniture area
- Stain entire floor with grain using rags or brush, remove excess
- Allow complete drying per manufacturer instructions (8-24 hours)
- Apply first finish coat in thin, even passes from far corner
- Let dry completely, sand lightly with 220-grit, vacuum and tack cloth
- Apply second coat, repeat drying and light sanding process
- Apply final third coat without sanding afterward
- Allow full cure time before furniture and normal use
Step 4: common mistakes and troubleshooting
Skipping floor assessment wastes time and money. Poor floor assessment before starting leads to refinishing failure when you discover mid-project that your floor lacks sufficient thickness for sanding. Always measure wear layer depth and test finish condition first.
Uneven sanding causes blotchy finishes because stain and finish absorb differently on varying surface textures. Keep your sander moving at constant speed. Overlap passes by half the drum width. Sand with the grain on all passes except the initial leveling cut. Check your progress frequently by looking at the floor from different angles in good light.
Rushing drying times between coats creates tacky surfaces that attract dirt and never fully harden. Temperature and humidity affect drying dramatically. Cold, humid conditions slow drying. Hot, dry conditions speed it up. Trust your product’s instructions and err on the side of waiting longer.
Ignoring dust control leads to finish defects like bumps, craters, and poor adhesion. Every speck of dust that lands in wet finish creates a visible defect. Vacuum multiple times, use tack cloths liberally, and keep the space sealed from air currents during application and drying.
Blotchy finish usually results from uneven sanding or inadequate stain removal. If you catch it early, you can screen the finish off and reapply. Once fully cured, you’ll need to sand again. Sticky finish that doesn’t dry indicates contamination, inadequate ventilation, or application over damp stain. Light sanding and recoating sometimes fixes it, but severe cases require complete removal.
Pro Tip: Inspect sanding progress every 15 minutes by stopping the machine and looking at the floor under bright light from multiple angles. Catching uneven spots early prevents compounding the problem through multiple grit stages.
Troubleshooting common problems:
- Blotchy stain appearance: Usually uneven sanding or stain application; sand again and apply stain more evenly
- Finish won’t dry: Remove with mineral spirits, ensure proper ventilation, verify stain is completely dry before reapplying
- Bubbles in finish: Applied too thick or shaken instead of stirred; sand smooth and apply thinner coats
- Dust nibs in finish: Inadequate cleaning between coats; sand lightly with 220-grit and apply additional coat
- Drum sander gouges: Stopped moving while drum was lowered; sand surrounding area to feather edges, may need coarser grit
Review flooring fail trends 2025 to learn from others’ mistakes and avoid repeating them in your project.
Step 5: expected results, costs, and maintenance
Typical refinishing with sanding takes 3-5 days including proper curing before you can safely move furniture back. Screening projects finish faster, often in one to two days total. Plan your timeline around these durations and add buffer time for unexpected issues or weather delays that affect drying.
Refinishing costs 30-50% less than full floor replacement and extends your hardwood’s life significantly. Professional refinishing in the Bay Area typically runs $3-$5 per square foot. DIY projects cost $1-$2 per square foot for materials and tool rental. Compare this to replacement at $8-$15 per square foot installed.
Your refinished floors should display uniform sheen, smooth texture free of scratches or bumps, and water resistance that causes spills to bead up rather than soak in. The finish should feel hard and fully cured, not tacky or soft. Color should appear consistent across the entire floor with no dark or light patches unless intentional in your stain choice.
Maintain your investment with regular care. Sweep or vacuum daily in high-traffic areas to remove grit that scratches finish. Use only hardwood-specific cleaners, never harsh chemicals or excessive water. Place felt pads under furniture legs. Use rugs in entryways to trap dirt before it reaches your floors. Recoat with fresh finish every 3-5 years to maintain protection without full sanding.
Refinishing project summary:
| Aspect | Screening | Full Sanding |
|---|---|---|
| Timeline | 1-2 days total | 3-5 days including cure |
| DIY cost per sq ft | $0.50-$1.00 | $1.00-$2.00 |
| Professional cost per sq ft | $1.50-$2.50 | $3.00-$5.00 |
| Dust volume | Minimal | Heavy (50+ lbs per 1,000 sq ft) |
| Results | Refreshed surface, light scratch removal | Complete restoration, deep damage repair |
| Longevity before next refinish | 3-5 years | 7-10 years |
Post-refinishing maintenance tips:
- Sweep or vacuum high-traffic areas daily to prevent grit buildup
- Clean spills immediately with damp (not wet) cloth
- Use only pH-neutral hardwood floor cleaners, never vinegar or harsh chemicals
- Place felt pads under all furniture legs to prevent scratches
- Use area rugs in entryways and high-traffic zones
- Maintain 35-55% relative humidity to prevent gaps or cupping
- Recoat with fresh finish every 3-5 years without sanding
Explore Bay Area flooring trends to see how refinishing fits into current design preferences and home value expectations in your market.
Upgrade your floors with Kapriz Hardwood Flooring Store
Refinishing breathes new life into existing floors, but sometimes you want more options. Whether you’re adding rooms or prefer new installation, Kapriz Hardwood Flooring Store offers solutions for every budget and style preference.
Discover durable wood species that complement your refinished floors or replace areas beyond repair. Red oak, white oak, and maple resist wear beautifully in Bay Area homes. Looking for budget-friendly alternatives? Compare laminate and luxury vinyl plank options that deliver hardwood’s appearance at fraction of the cost.
Engineered hardwood provides stability and style for rooms where solid wood struggles with moisture or subfloor limitations. Our inventory ranges from high-end luxury to affordable quality, all meeting our strict standards for durability and value.
Why choose Kapriz:
- Quality products we trust and use ourselves
- Expert guidance matching your needs and budget
- Competitive pricing without sacrificing quality
- Full range from luxury to value options
FAQ
How often should hardwood floors be refinished?
Most hardwood floors need refinishing every 7-10 years depending on traffic and wear patterns. High-traffic areas like hallways and kitchens may require attention sooner. Light screening every 3-5 years extends time between full sanding projects.
Is it possible to refinish engineered hardwood?
Yes, but only if the wear layer measures at least 2-3mm thick. Thinner wear layers can’t withstand sanding without exposing the plywood core underneath. Check with your flooring manufacturer for specific recommendations on your product.
Can I refinish floors myself or should I hire a pro?
DIY works for small rooms if you’re comfortable with power tools and following detailed processes. Professionals reduce risk of costly mistakes like drum sander gouges and ensure proper dust containment. Large areas or valuable floors justify professional expertise.
What safety precautions are important during refinishing?
Wear properly fitted respirators rated for fine particles, not basic dust masks. Use hearing protection with loud sanders. Ensure excellent ventilation to reduce fume exposure from finishes. Employ dust containment systems to minimize airborne particles throughout your home.
How long before I can move furniture back after refinishing?
Wait 3-5 days total for drying and initial curing before placing furniture. Use felt pads under all furniture legs immediately. Full cure takes 30 days, so avoid area rugs and heavy traffic during this period to prevent finish damage or imprints.
Recommended
- How to Keep Your Laminate Floors Looking Fabulous: A Fun and Foolproof | Kapriz Hardwood Flooring Store
- 2025 Flooring Guide – Hardwood Durability vs. Laminate Ease vs. Vinyl | Kapriz Hardwood Flooring Store
- When Hardwood Floors Go Wrong – 5 Common Issues and Expert Solutions for | Kapriz Hardwood Flooring Store
- When Hardwood Floors Go Wrong – 5 Common Issues and Expert Solutions for | Kapriz Hardwood Flooring Store
